Introduction
Hello all.
I’ve come to share with you all bunch of tips and tricks can be applied to condo building.
I recommend having Calculator and a Text Editor to hand to get the most out of them. A familiarity with Cartesian coordinates and Euclidean geometry is desired but not required.
Please be aware, however; When you are using the Manipulate window to transform an object’s position, rotation, and scale that Tower Unite/Unreal Engine 4 only supports decimals with a maximum of 6 degrees of precision.
As such, any number entered in to any of the object’s transform fields that have commas or trailing decimals longer than 6 digits will be truncated and precision will be lost.
Glossary of terms
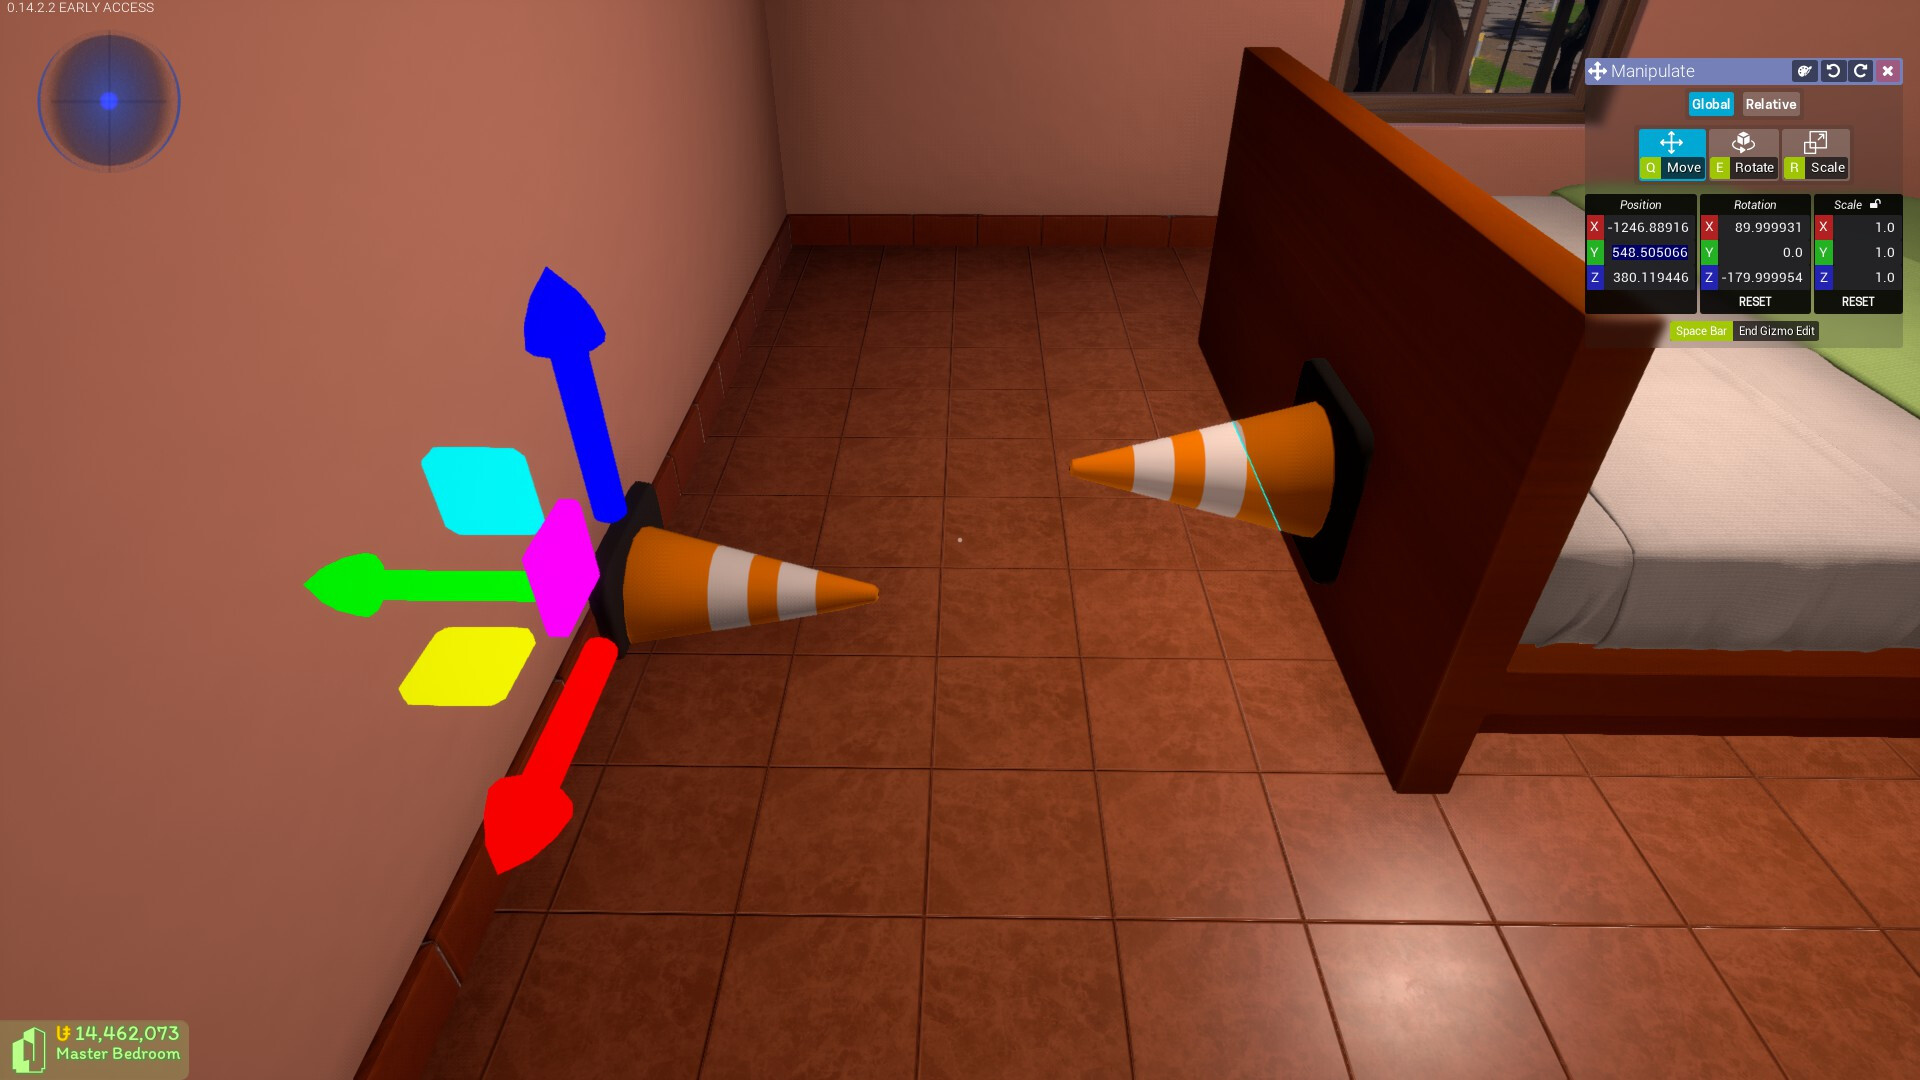
Gizmo
These are the RGB arrows that allow to you reposition objects along a single fixed axis based on which arrow you are dragging with the mouse. The CMY squares between the arrows allow you reposition objects along two axes.
Pay close attention to the directions the arrows are pointing in. The object’s position on whichever axis will increase if you mouse drag in the direction the arrow is pointing in, and will decrease in the reverse direction.
Origin
Otherwise known as the pivot point. This is the centre of the world and exists at the coordinates 0,0,0.
Every object you place in your condo is positioned relative to the world origin. Every object also has its own origin/pivot point which dictates where and how it scales and rotates.
Clicking on an object will display the Gizmo at the object’s origin/pivot point.
X/Y/Z
The object’s position.
Both the world and an object have their own X, Y, and Z axes. An object’s initial X, Y, and Z axes will be the same as the world’s. Relative to the world, negative X values are North and negative Y values are East. Z value is obviously height.
For objects, you can swap between Global and Relative positioning. Global will transform an object’s new position relative to the world. Relative will transform an object’s new position relative to its own rotation when dragging the Gizmo arrows to reposition.
P/Y/R
The object’s rotation.
P is the Pitch value and corresponds to the X field in the rotation section of the Manipulation window. When you look up or down with your head, you are pitching it up and down.
R is the Roll value and corresponds to the Y field in the rotation section of the Manipulation window. Flexing your neck from side to side rotates your head on the Roll axis. A full rotation on this axis would be called a barrel roll, hence the term. Do a barrel roll!
Y is the Yaw value and corresponds to the Z field in the rotation section of the Manipulation window. If you are sitting in a swivel chair and can spin around in it, you are rotating on the Yaw axis. The in-game T-pose emote has your character spin on the Yaw axis.
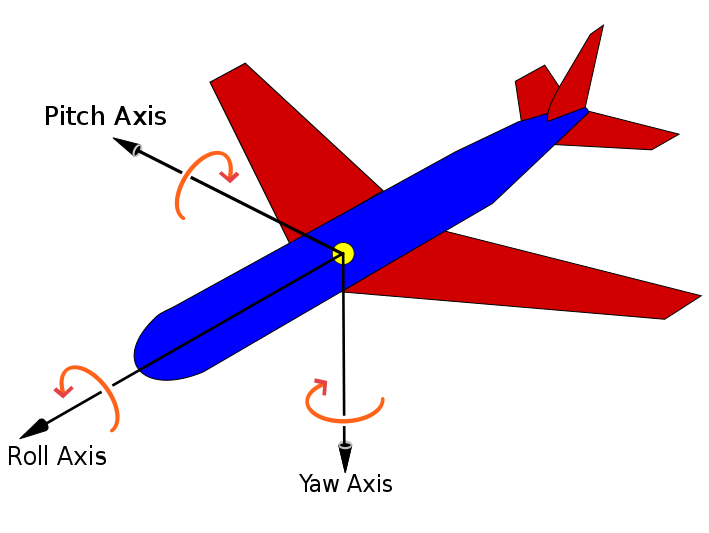
Aircraft principal axes
Parellel Lines/Faces
These would be defined as a pair of lines and/or faces of an object that stretch out for infinity and remain the same distance from each other at any given point in 3D space.
Techniques
1. Find the width, length, or height of a space, or an object
Place two objects at opposite locations.
Note that they do not have to be directly opposite, so long as the objects are at least snapped to surfaces that are absolutely parallel with each other, it’s generally not a problem.
If the surfaces are rotated (eg. are diagonal), and do not align with the world’s X/Y/Z axes, then finding the distance between two points will be more difficult and will require the application of geometric trigonometry (eg. Sin, Cos, Pi, and the Pythagorean Theorem in particular), which is a whole different branch of math. If the surfaces are not parallel, this technique will fail.
Copy from both objects their positions on a shared axis. Proceed to subtract the smallest value from the largest value.
If the object is straddled over the world origin and you have a pair of positions which are positive and negative, remove the minus symbol from the negative position and add both positions together.
You can use this technique to calculate an adjustment in order to manually position objects such as furniture so that they are flush with a surface as precisely a possible.
In this example, I am using Construction Cones:-
548.505066 is our target position,

397.086548 is our source position,
Subtracting 397.086548 from 548.505066 (the source from the target position) on Y axis will give us a value of 151.418518 which we can then use to add to the Y position of this bed so that it is flush with the trim/skirting board.

Thankfully, the Manipulate window allows us to perform simple mathematical operations inside the transform fields. Typing a simple sum in to the field and pressing enter will calculate the answer.

Hey presto, the bed is now flush with the skirting board. Now what?
2. Find the centre between two points
A lot of furniture objects have their origin/pivot point set to the bottom of the model, such as these Pyramid Planters. So, what if you needed to find the centre of the object on the object’s Z axis?
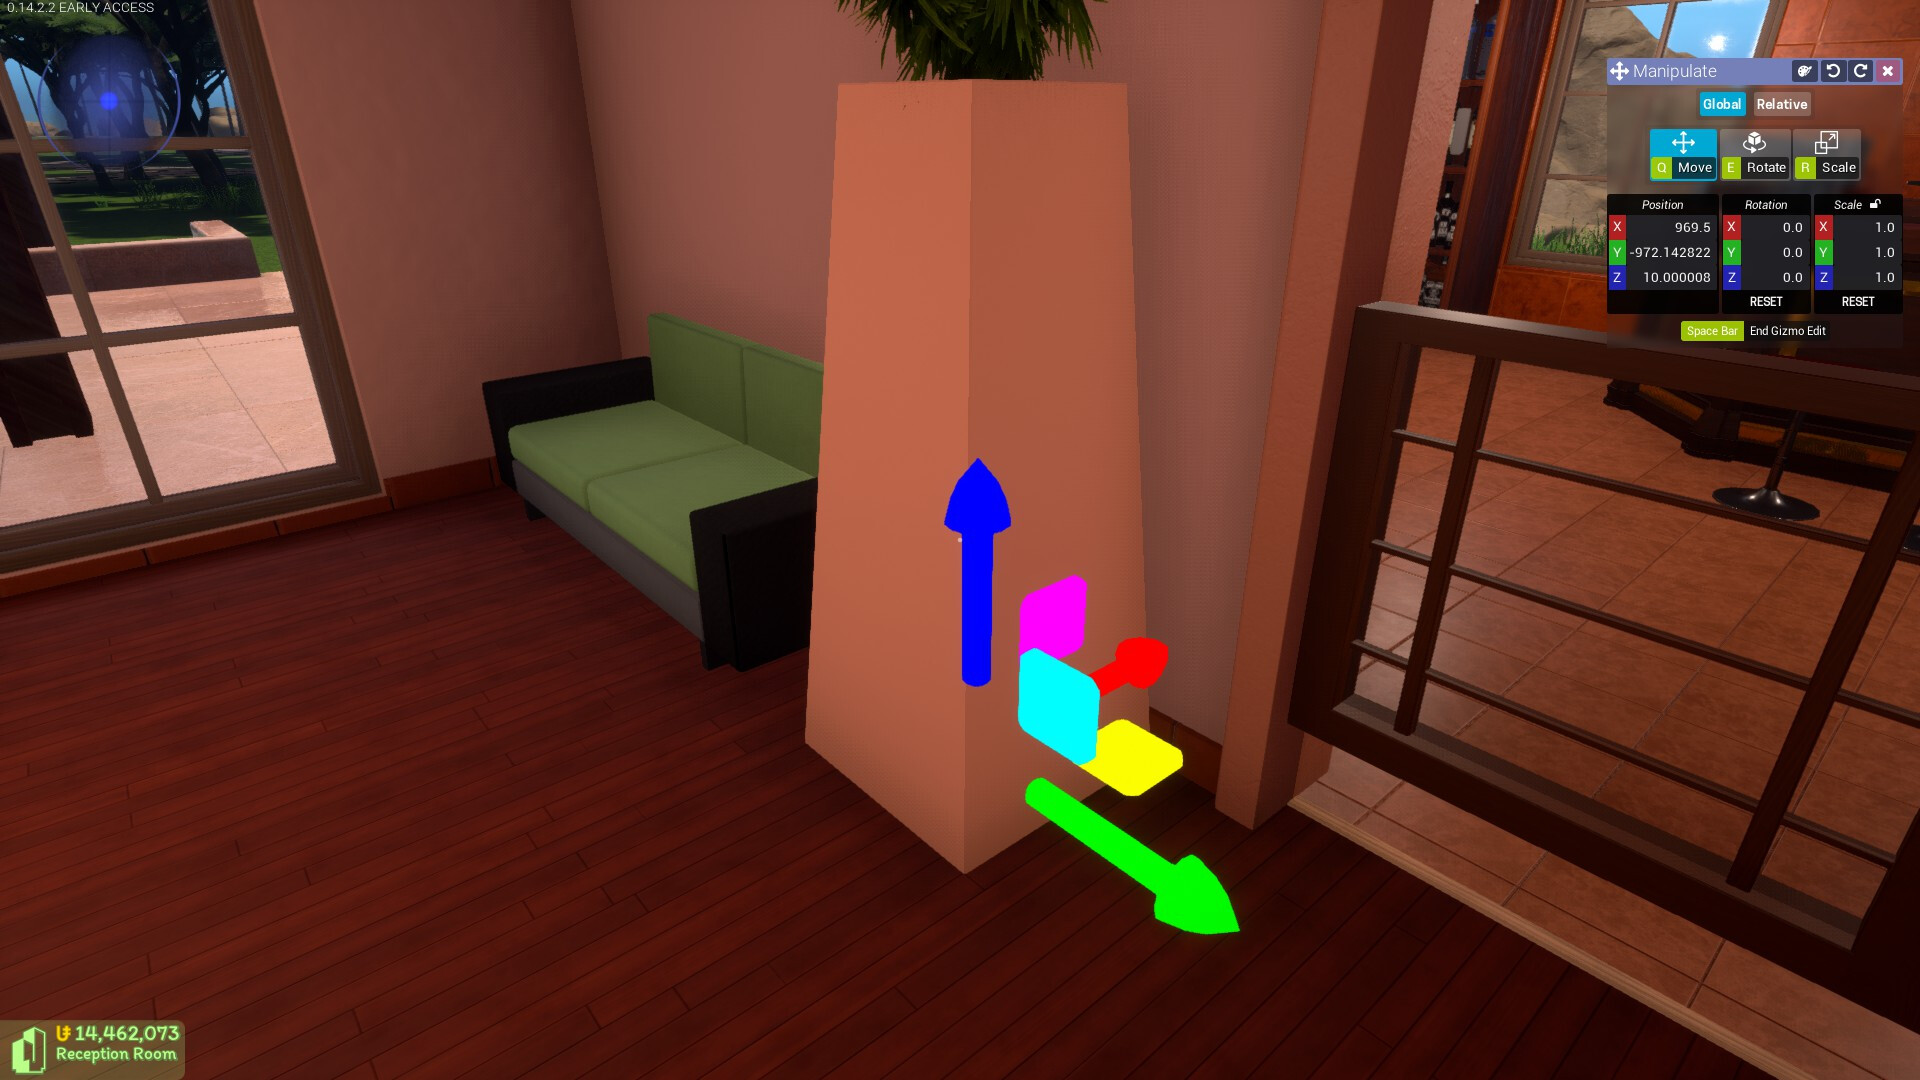
Using Construction Cones in this example, I place one on the floor and another on the topmost lip of the Pyramid Planter to determine its height:-

152.516129 is the Z position of the topmost lip on the Pyramid Planter.
10.0 is the Z position of the floor and the base of this Pyramid Planter.
We take the 152.516129 and 10.0 and add them together, giving us a sum of 162.516129, but this is not the value we want for the vertical centre of the Pyramid Planter. To get that, we need to divide 162.516129 in half.
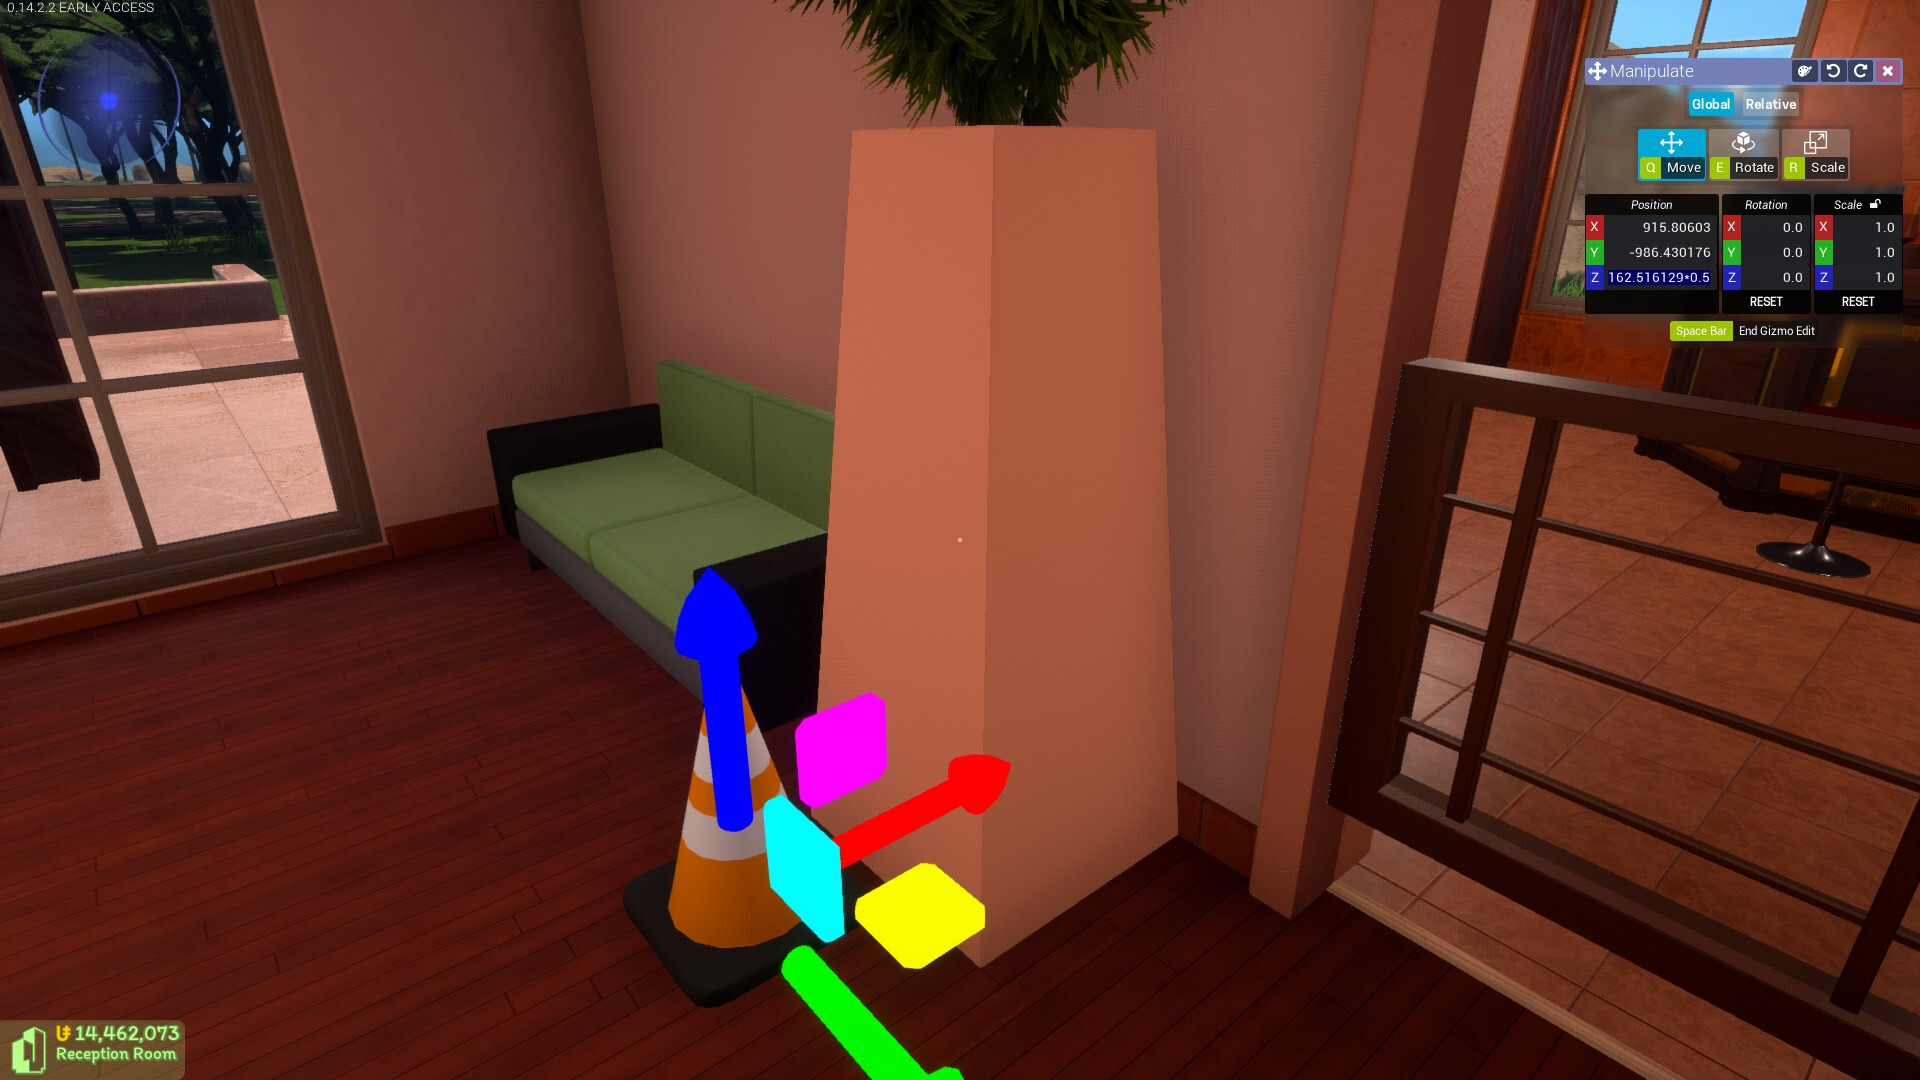
You can either do 162.516129 ÷ 2 or 162.516129 × 0.5. It makes no odds as they accomplish the same goal. Though multiplication by 0.5 is generally computationally faster.

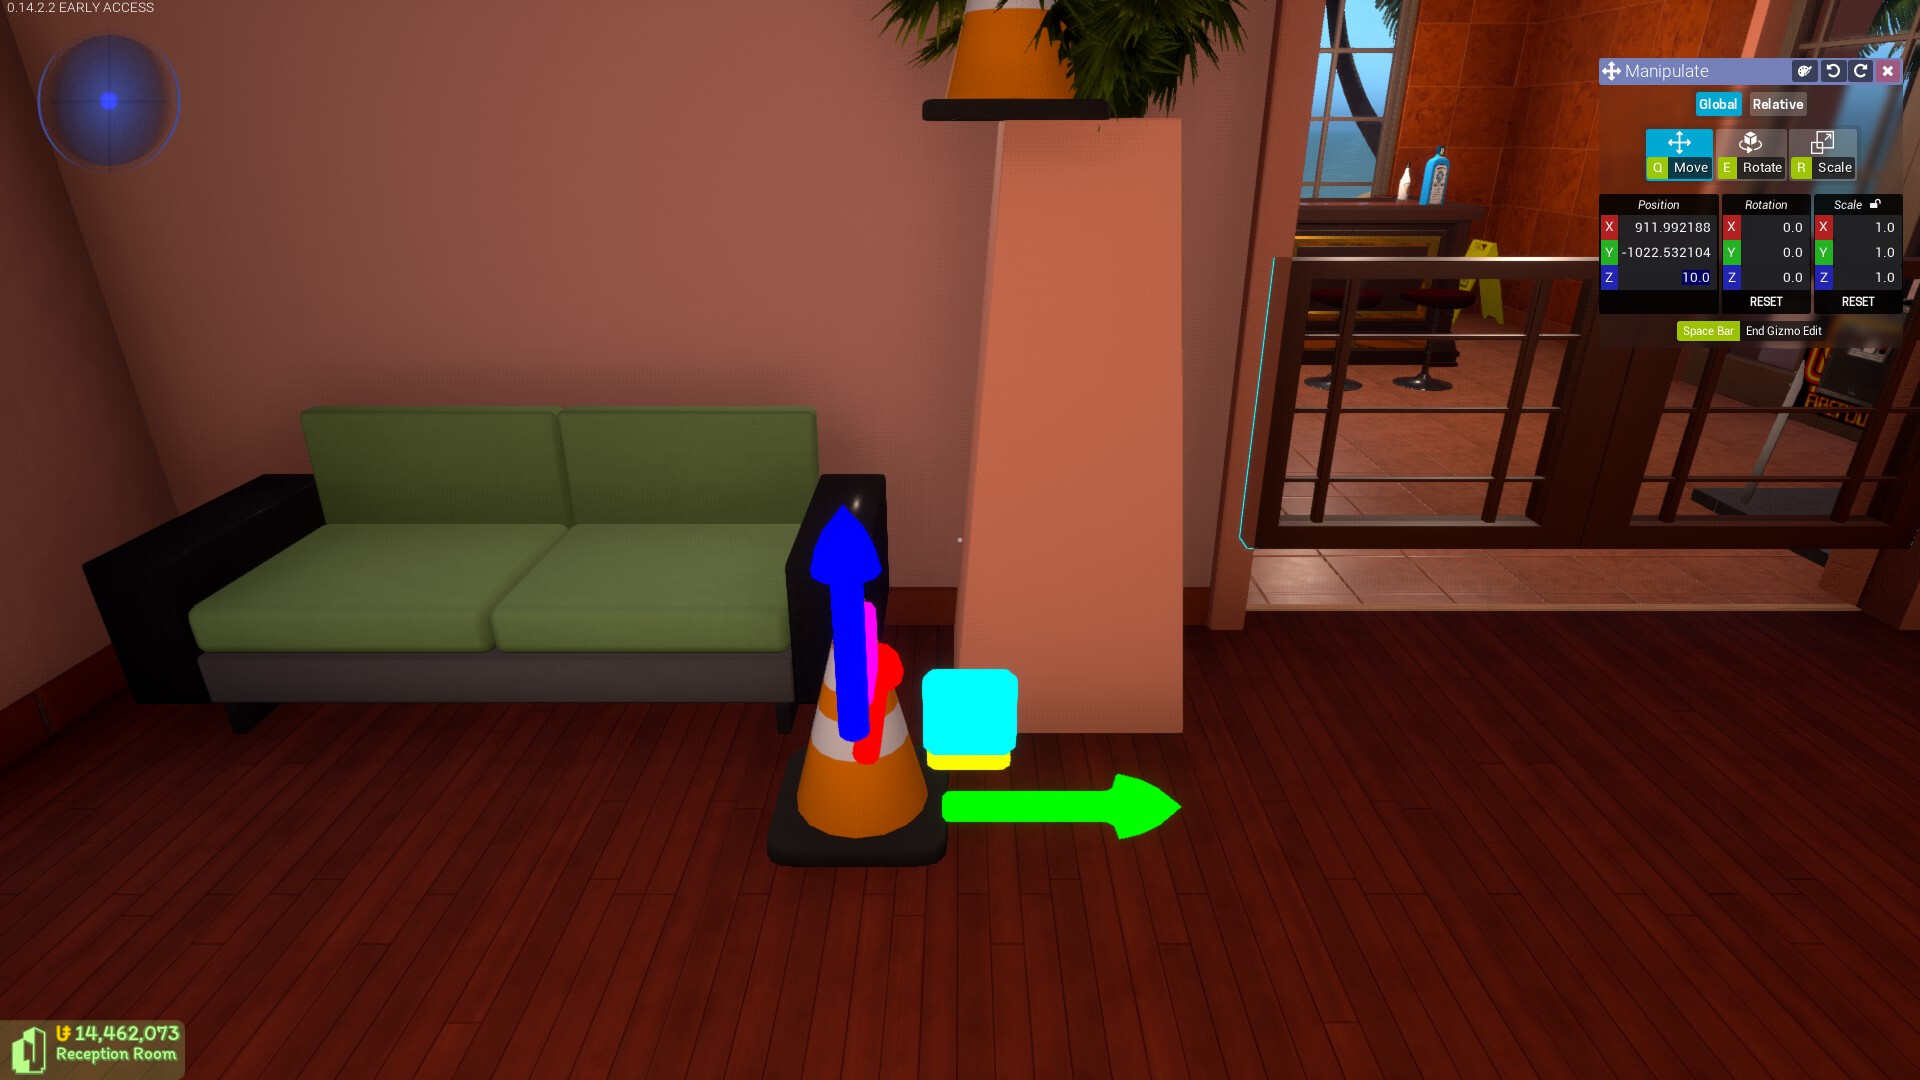
This gives us a final position of 81.258064 which is the exact vertical centre of the Pyramid Planter as highlighted by this cone.
This technique can also be used to position an object so that it is equidistant between two other objects or surfaces.
3. Scale objects to fit specific spaces
This technique employs what you’ve learned in the first technique with regards to finding an object’s dimensions. With this technique, you can scale an object up or down to fit a specific space.
You first need find the dimensions of both the space that the object will be scaled to fit, as well as the object itself.

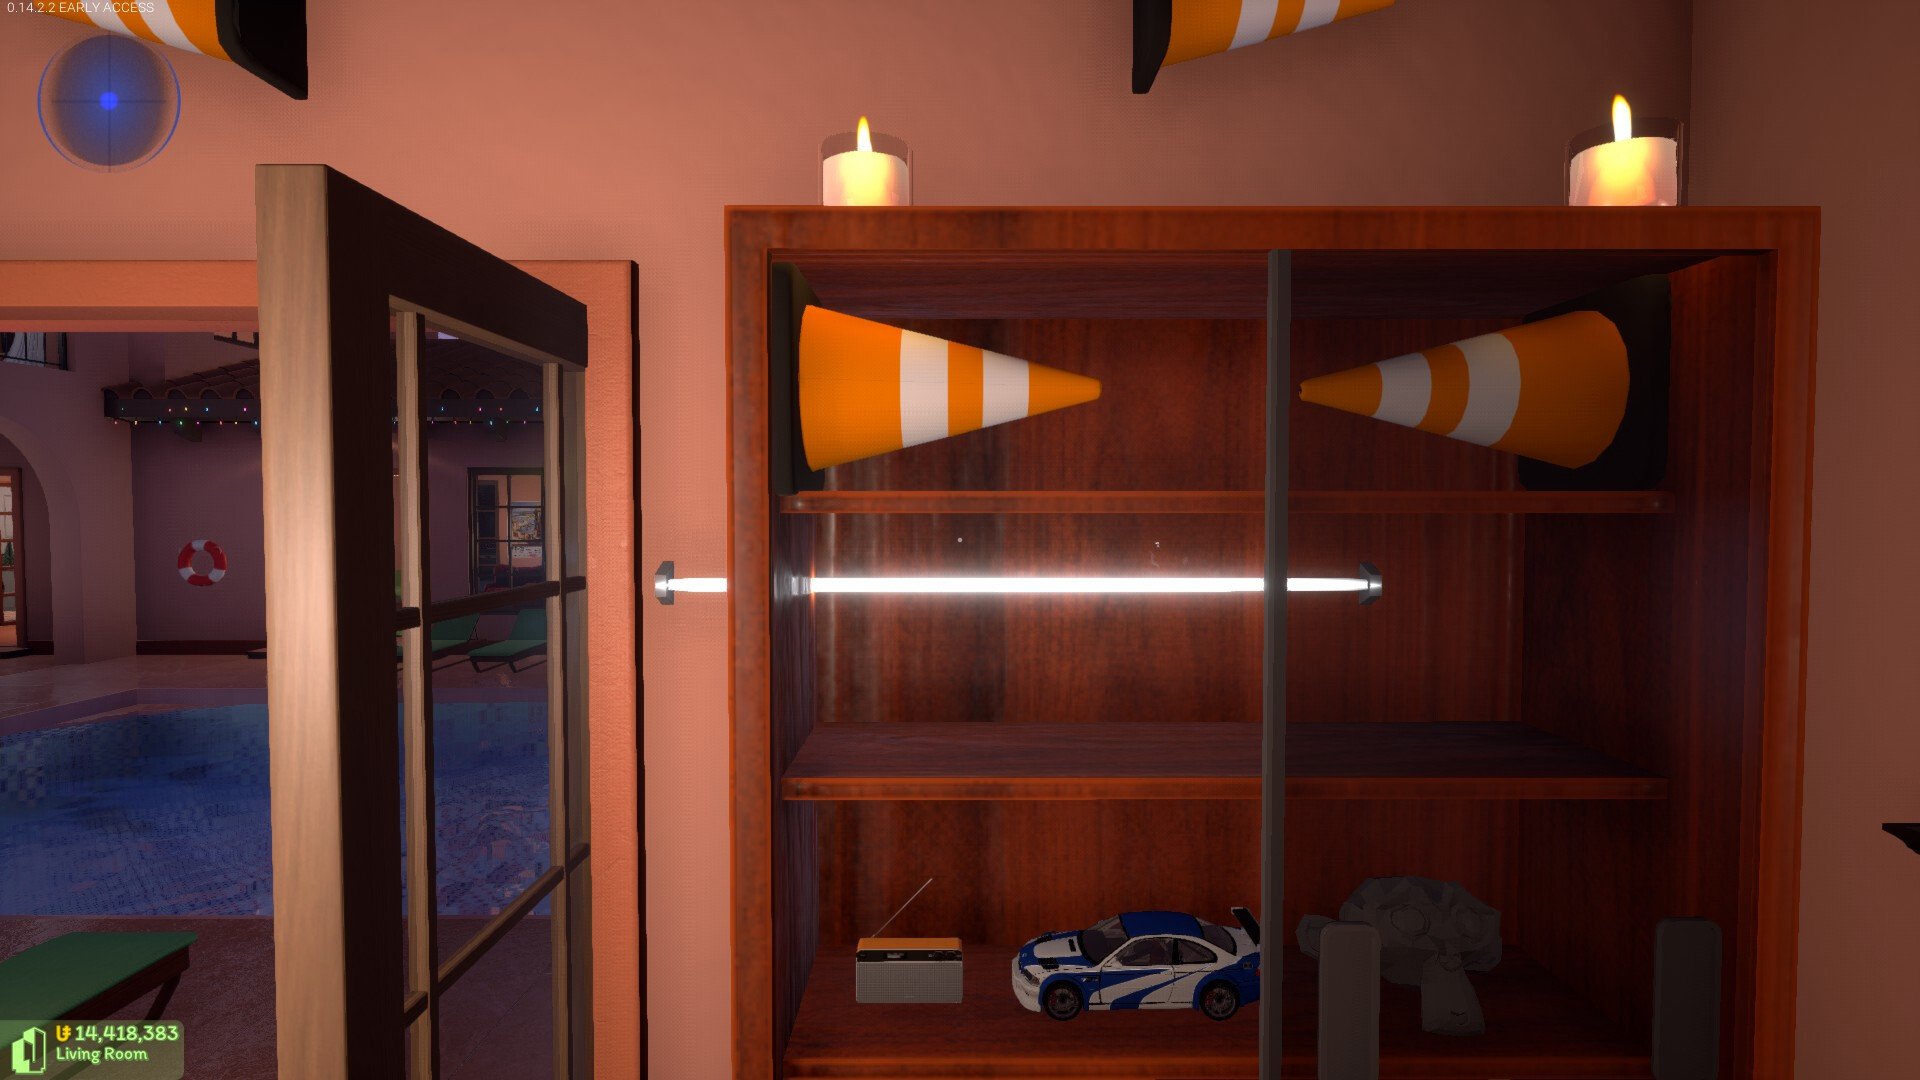
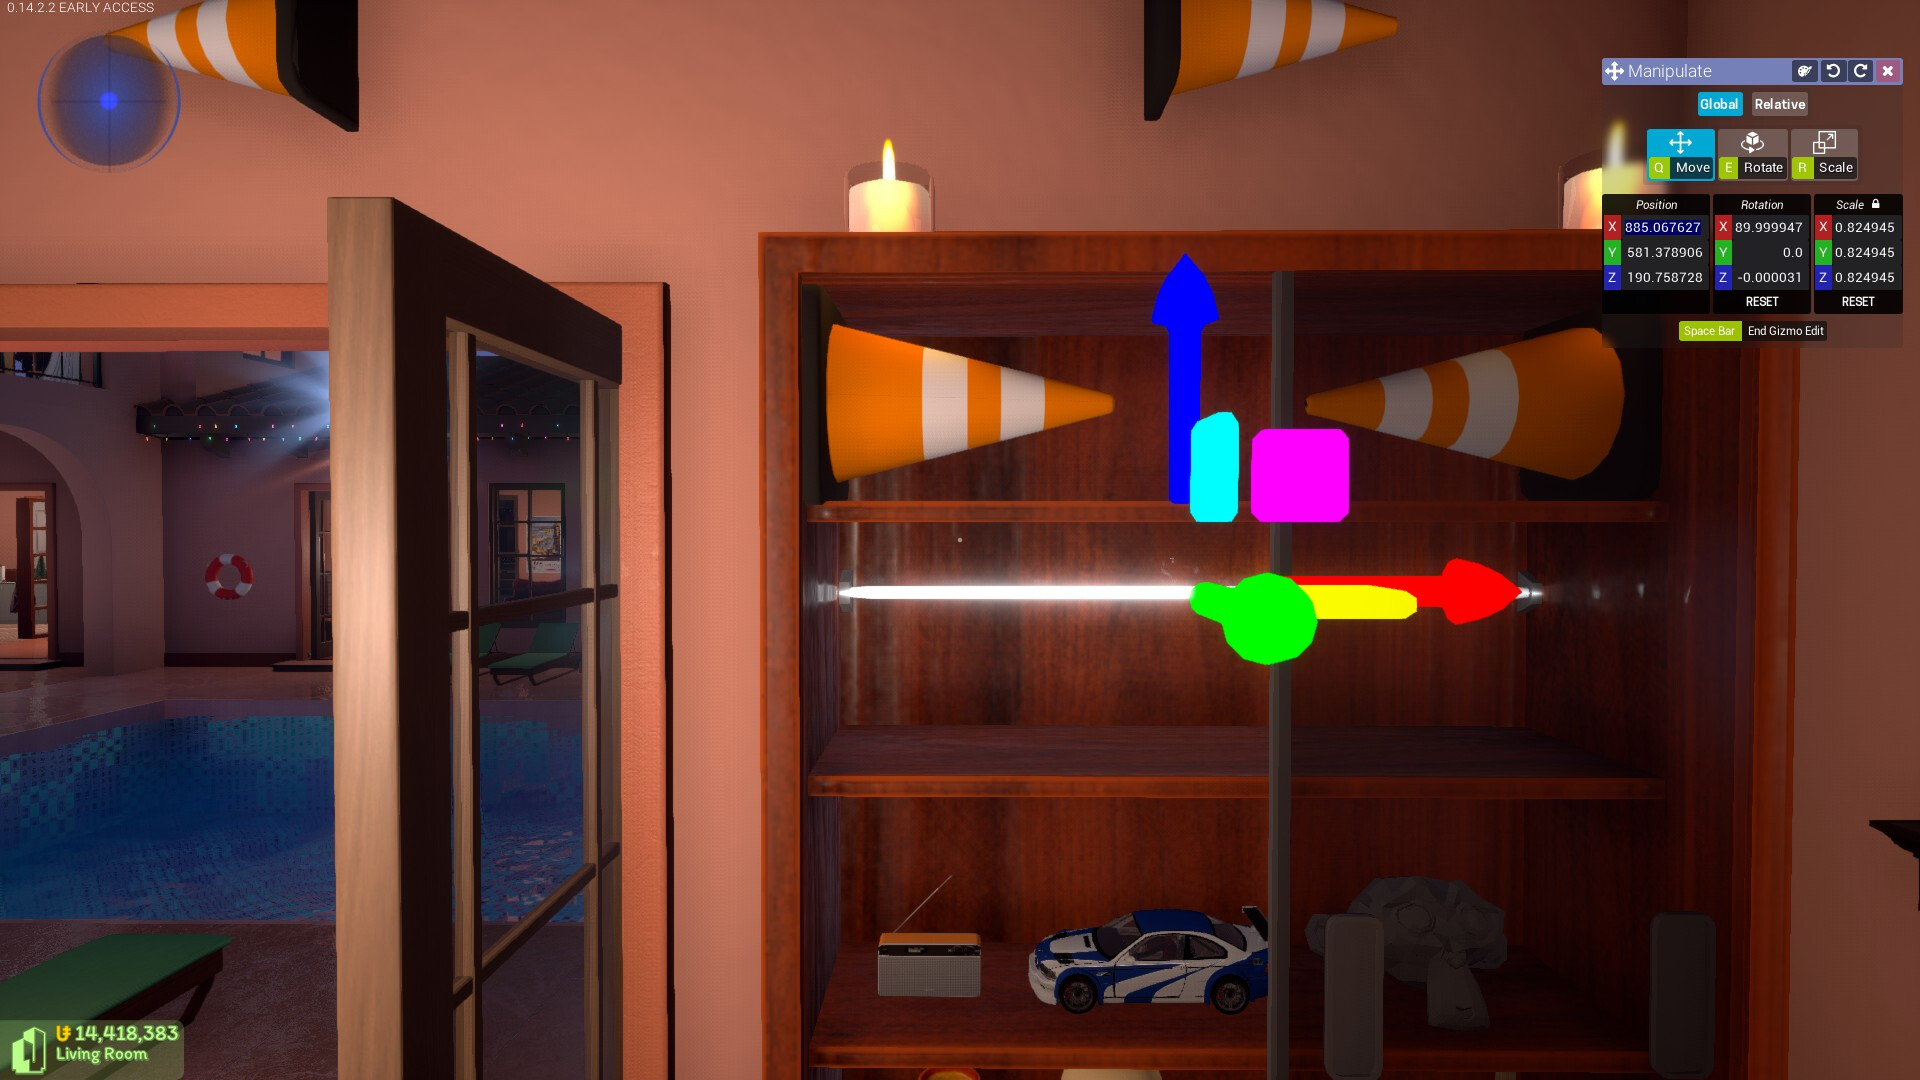
In this scenario, I want to scale a Neon Bar to fit inside the centre of the Display Cabinet. As you can see, I already have my measuring cones set up.
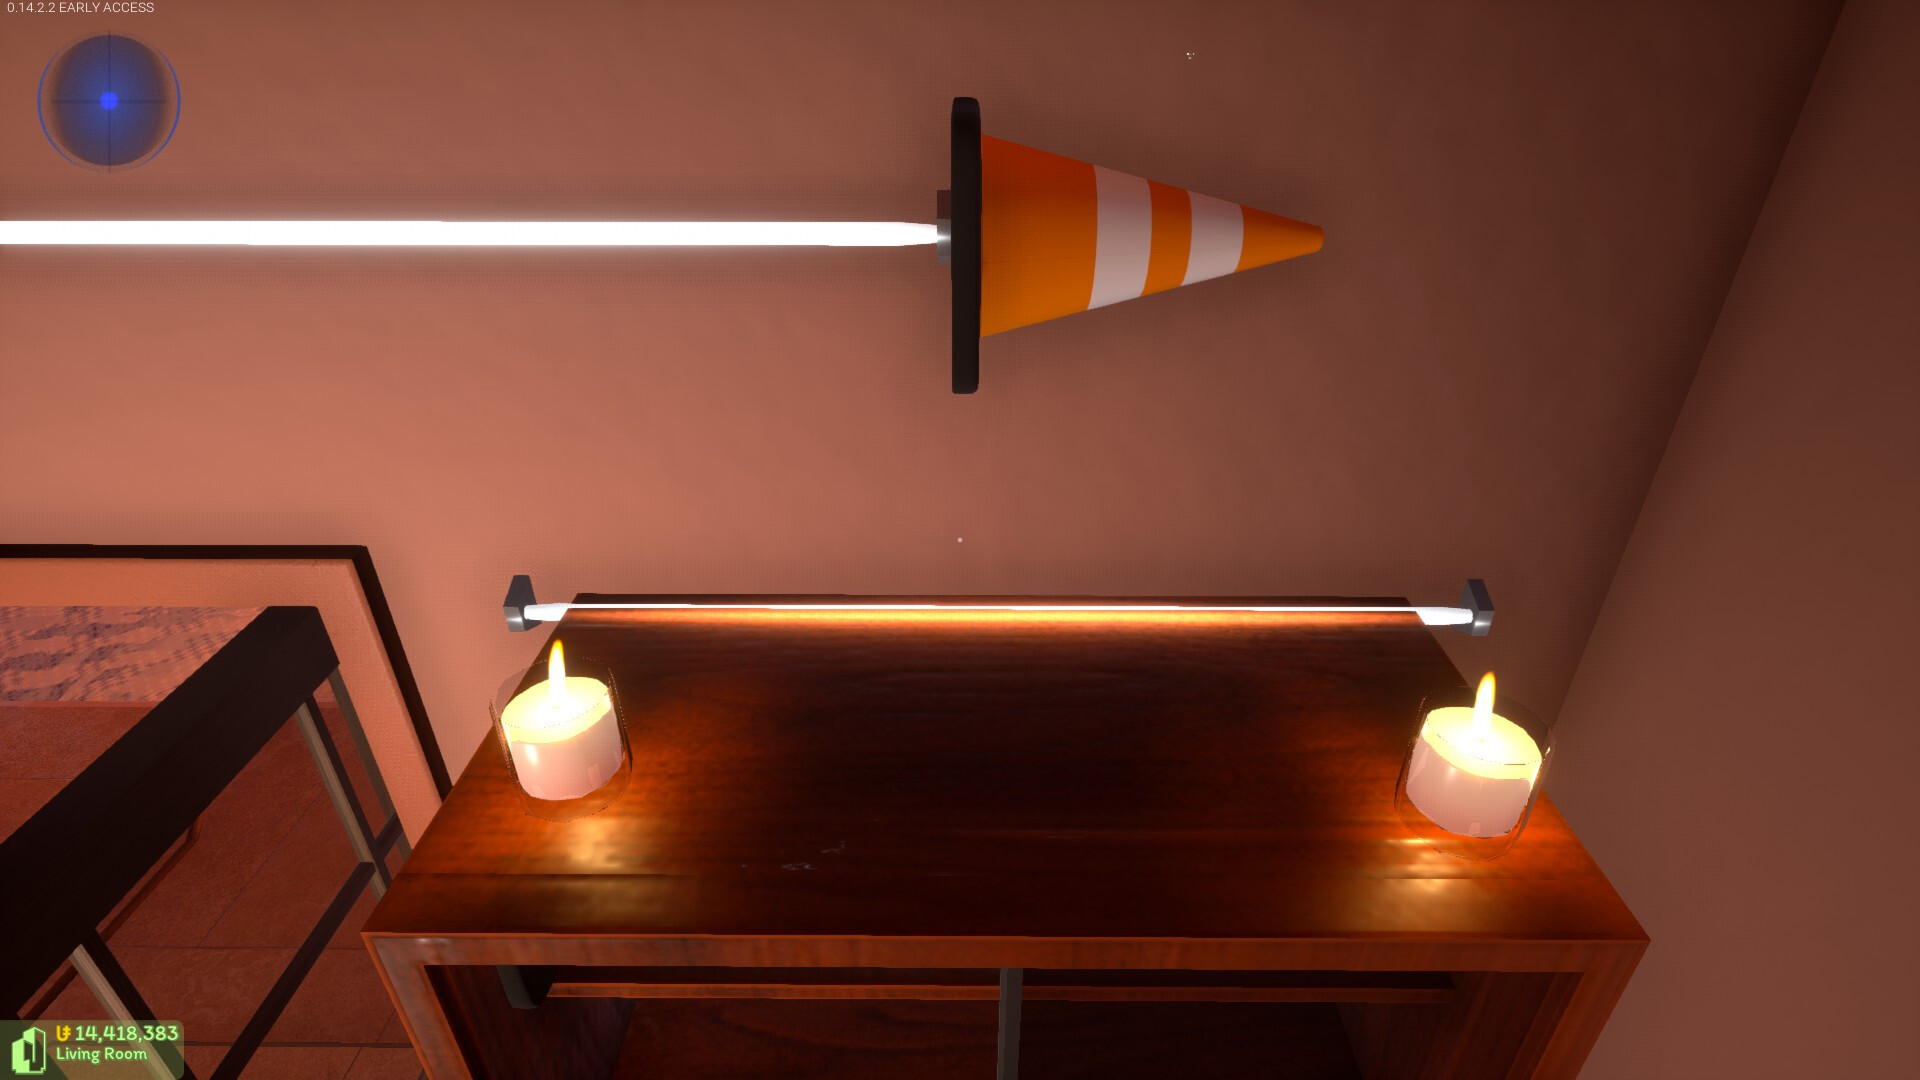
By default, the Neon Bar is too large for the target space inside of the Display Cabinet and will appear to clip through the edges, which isn’t very aesthetically pleasing.
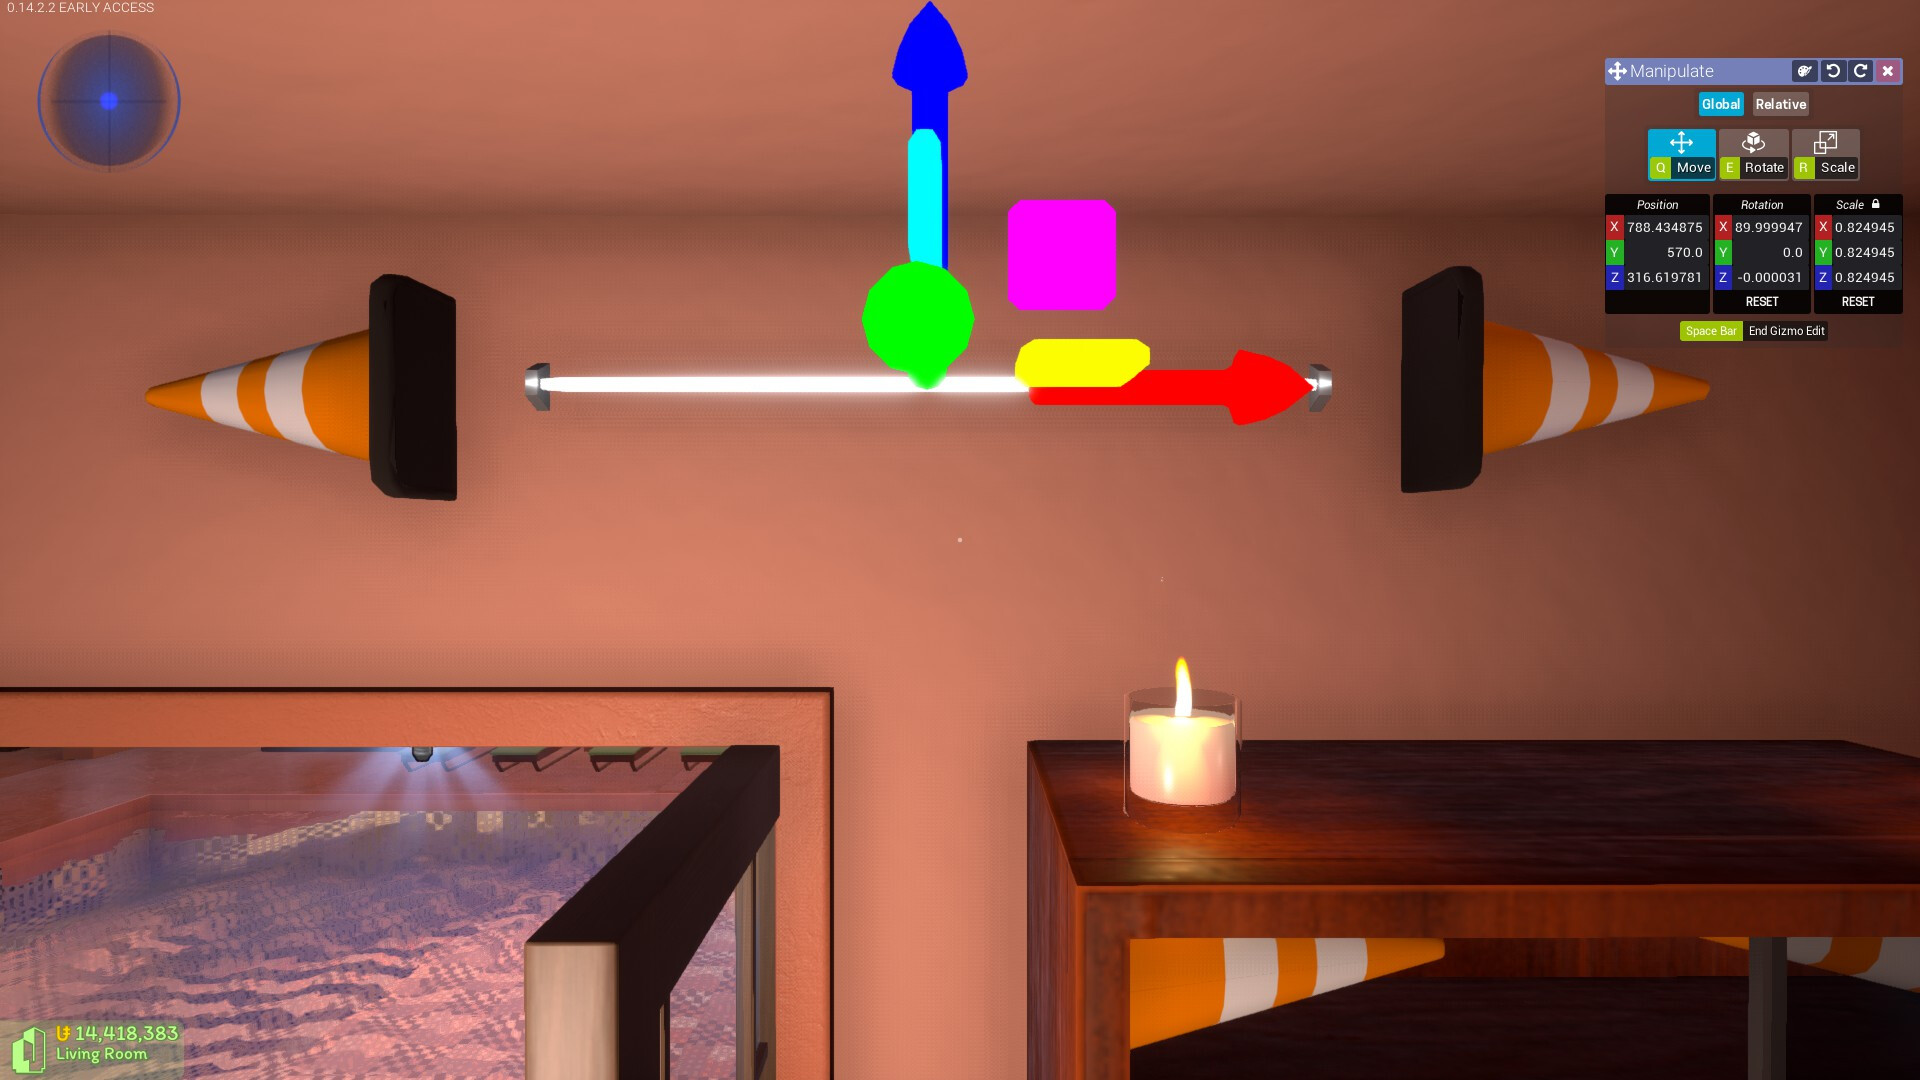
Using the first technique, the Neon Bar is determined to be 179.999938 units across (let’s just say 180.0 units for arguments sake) and the inside of the Display Cabinet to be 148.490052 units across.
In order to find the what the scale of the Neon Bar should be to fit the inside of the Display Cabinet, we use a Calculator to divide 148.490052 by 180.0.
This gives us a value of 0.8249450174810616 to apply to the Neon Bar’s X, Y, and Z scale parameters. However while this number is incredibly precise, it is too precise for even the game to handle.
As described at the beginning of this guide, the transform fields in the Manipulate window will only accept decimals with 6 trailing digits of precision maximum. Any lost precision will be negligible and you’ll not notice the difference.
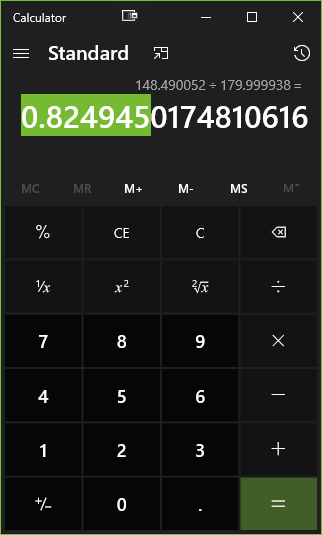
Thus I need only copy the first 7 digits including the decimal point from Calculator.
A scale of 0.824945 is all that is required to copy and paste in to the Neon Bar’s X, Y, and Z scale parameters.
I have now dragged and dropped the Neon Bar in to the inside of the Display Cabinet so it is flush with the back wall, it doesn’t matter where as I can fix any clipping issues with a simple copy and paste.
To fix this, I can copy the Display Cabinet’s X position and paste it in to the Neon Bar’s X position for a quick and dirty fix, which achieves the desired result.
I can now clean up and get rid of the cones as they are no longer needed.
Do be aware however, that when attempting to scale objects to fit spaces, the order of mathematical operations is important.
To scale up, divide as such: Largest ÷ Smallest
Eg. 179.999938 ÷ 148.490052 = 1.212201…
To scale down, divide as such: Smallest ÷ Largest
Eg. 148.490052 ÷ 179.999938 = 0.824945…
4. Canvas scaling
This technique is fairly trivial, and allows you to scale a canvas with respect to the image’s aspect ratio, avoiding stretched pixels and preserving image quality. This is not necessary if the source image is exactly square.
Open the image URL of your canvas in an external browser and make a note of its dimensions that are displayed in the tab’s title bar.
What you need to do is take the dimensions of the image and copy these in to the X and Y scale parameters of the canvas.
You will need to insert a decimal point somewhere in to the X and Y values you have copied or otherwise the canvas will either be too large or too small.
For example, if we take an 3:2 (3008x2000) image taken with a digital camera, we don’t want to be entering the 3008 and 2000 values directly in to the X and Y fields otherwise the canvas will be huge.
By inserting decimal points in to the image dimensions we can scale the canvas on the X axis to 3.008 and on the Y axis to 2.0 which will make the canvas a far more sensible size.
5. Fake Monitor Screens/Overlays
This technique is a simple one and it involves placing a canvas over the media player screen of a Monitor.
Ideally you should be using an image with a 16:9 aspect ratio, and should leave the Shape setting set to Square.
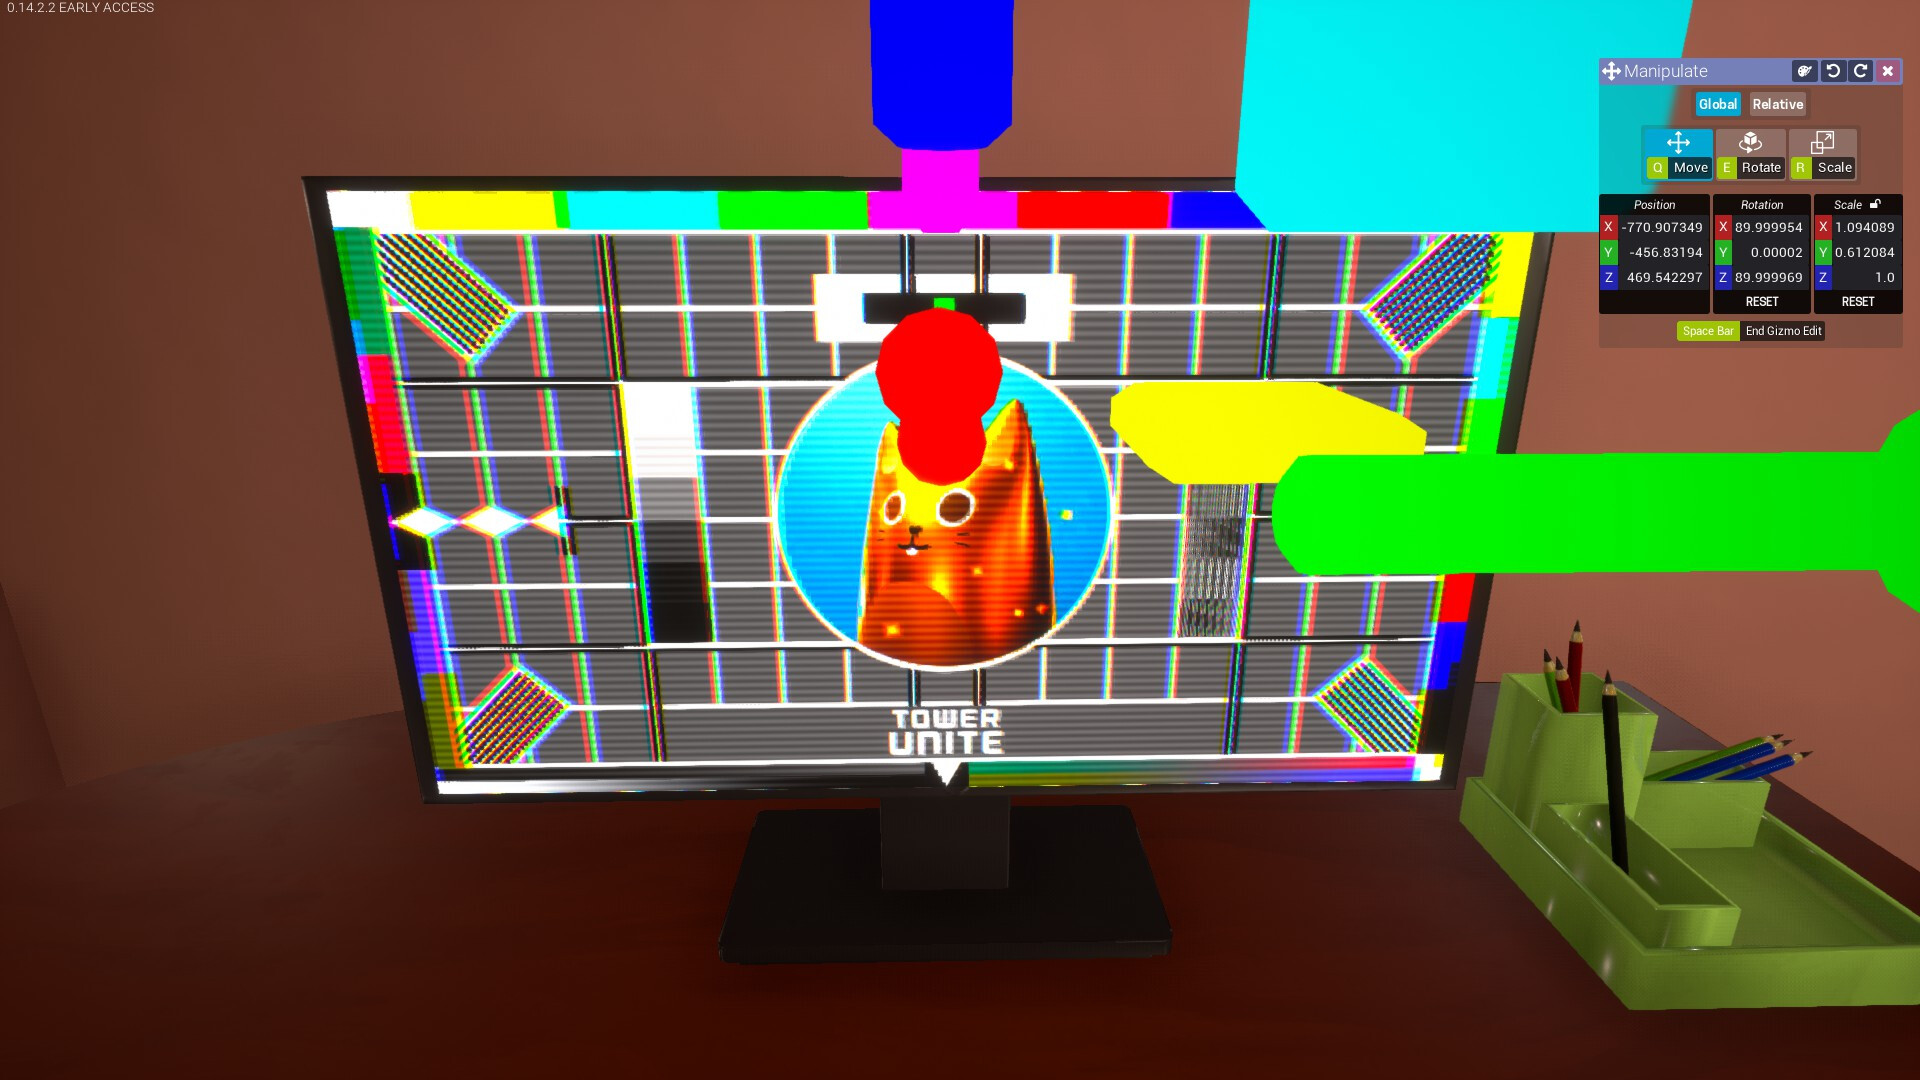
Scale the canvas up to 1.094089 on the X axis and down to 0.612084 on the Y axis.
You can also use the find the centre technique as described above to align it nicely with the centre of the Monitor’s media player screen.
Other useful information
Optimal position for Bowling Ball Rack
Positioning the Bowling Ball Rack so that it is flush with a wall is tricky to get right.

You should first drag and drop it so that it’s snapped to the target wall.
At first, it might look odd as it is initially rotated to be perpendicular to the wall.
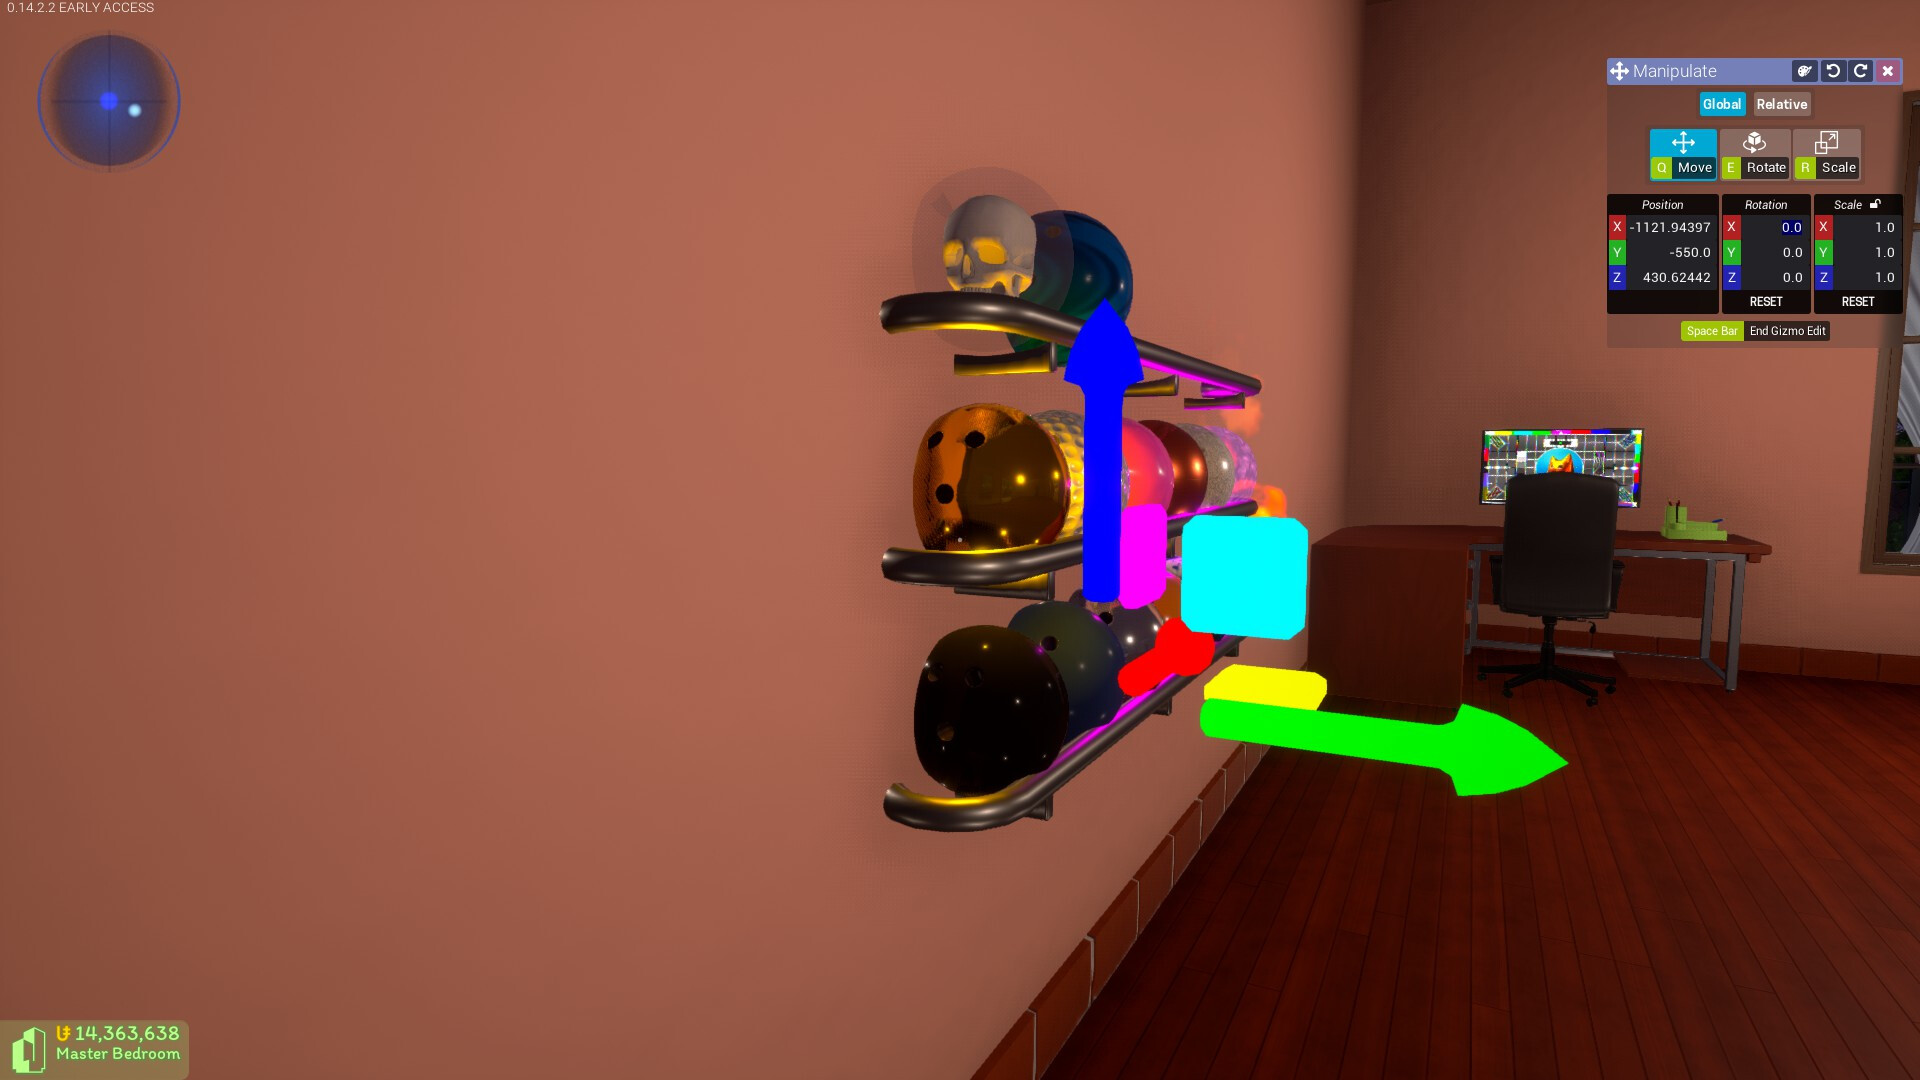
This can be fixed by setting its Pitch/X angle to 0.0.
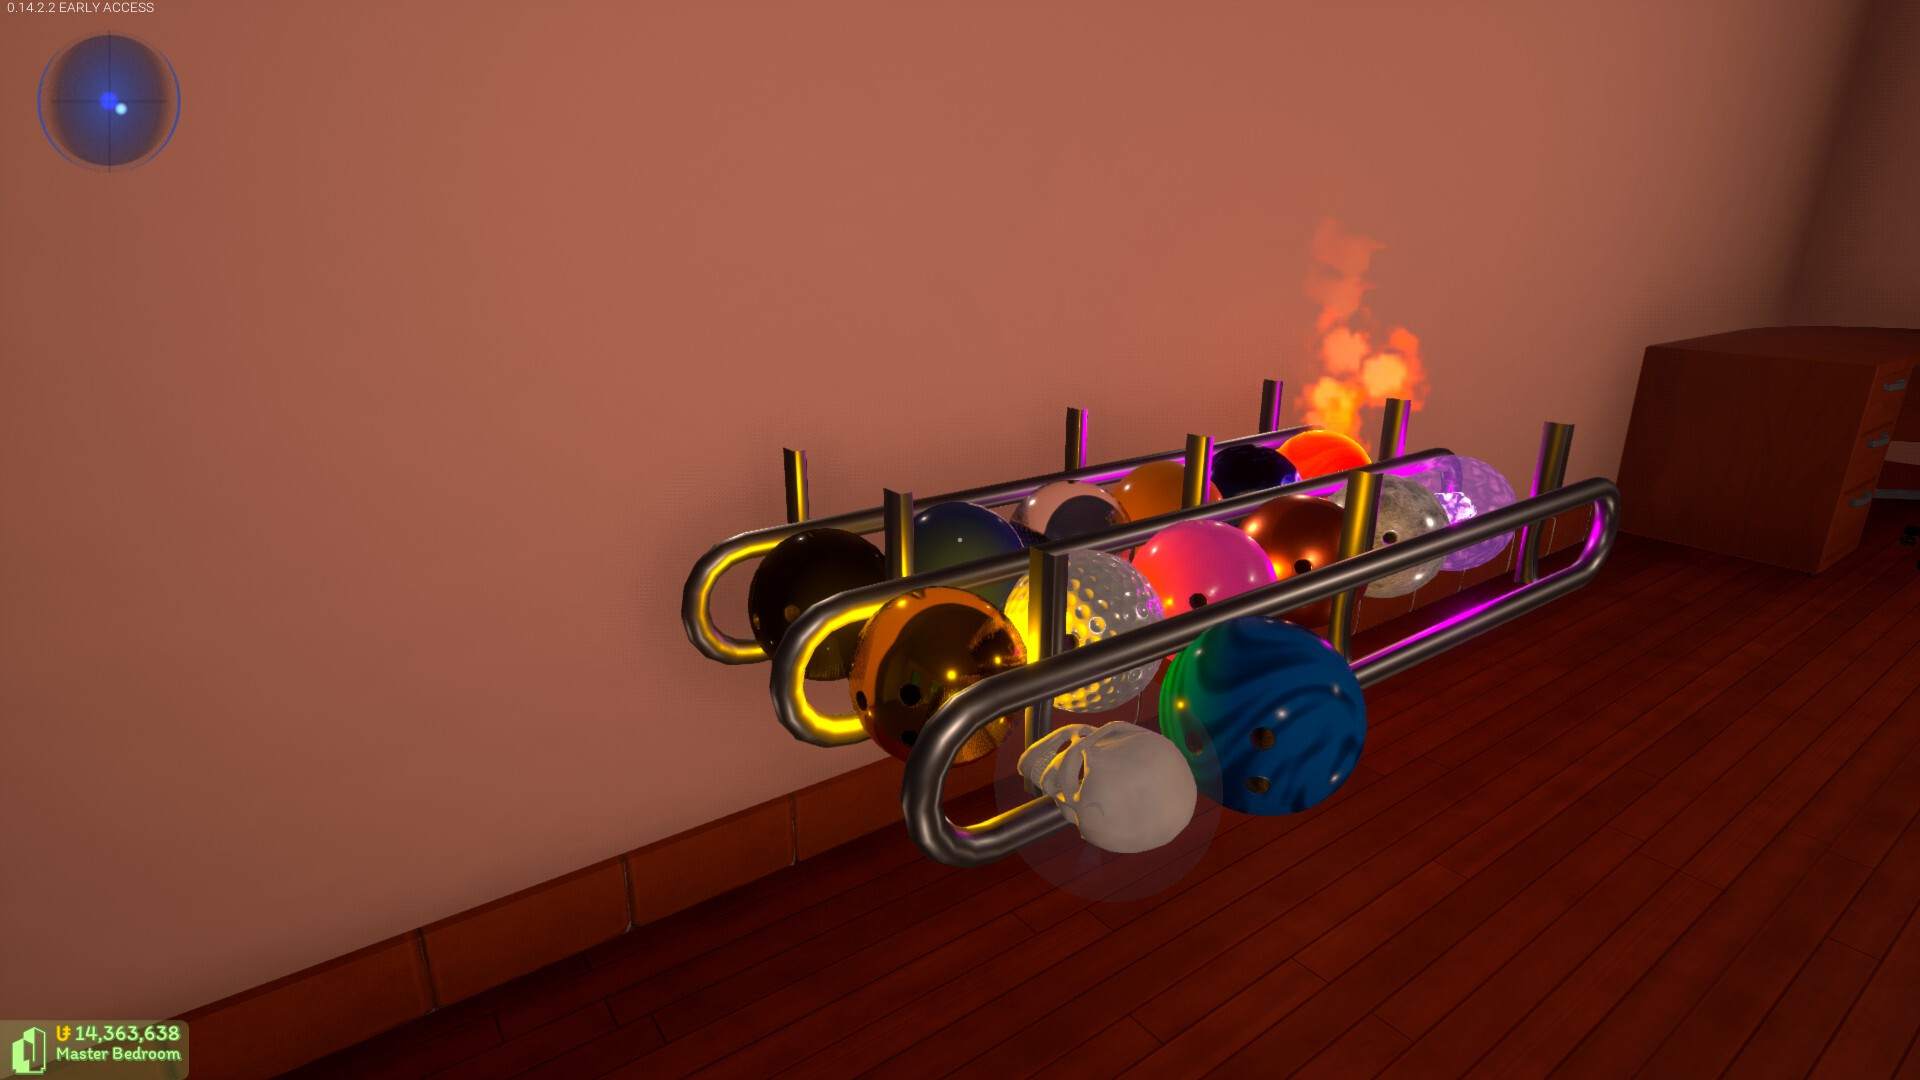
That’s great and all, but the bowling balls still appear to clip through the wall. This can be fixed.

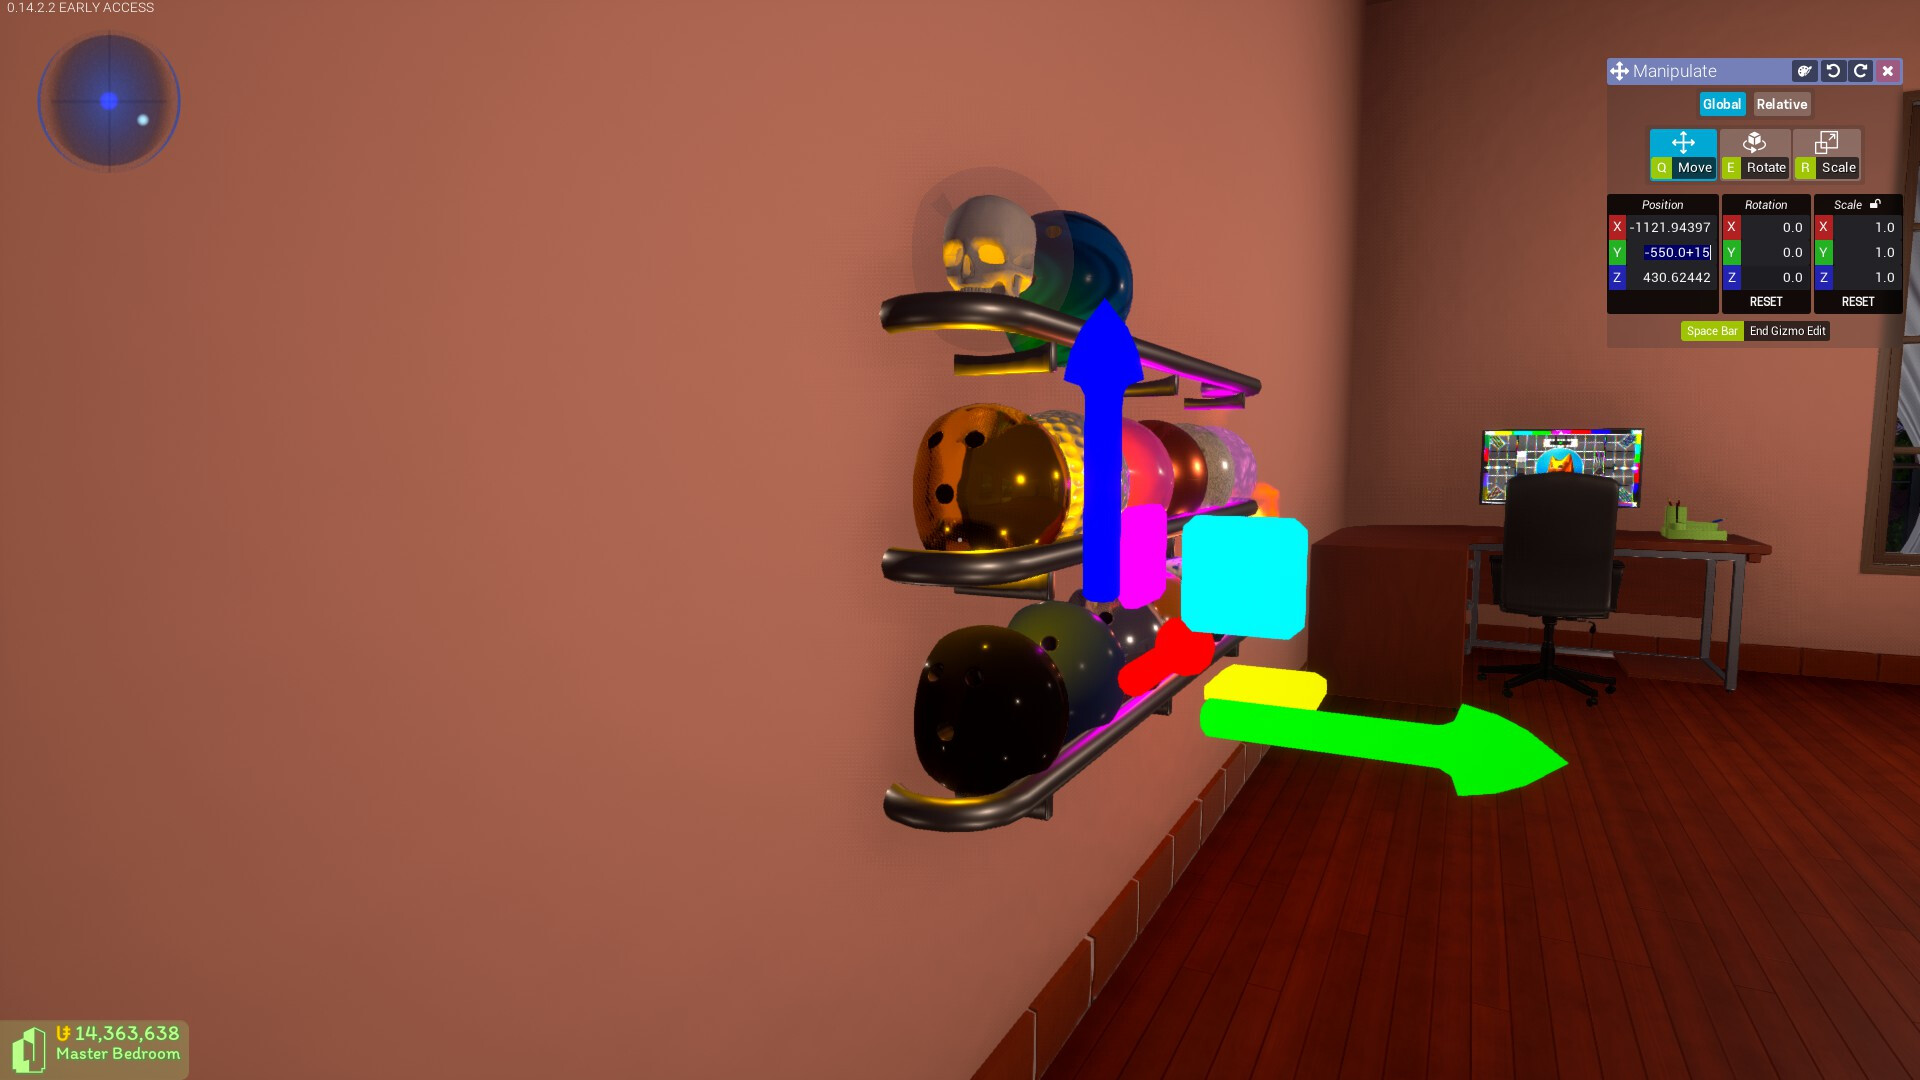
So to fix this, we offset it from the wall by 15 units.
I discovered this by analysing the Bowling Ball Rack’s vertices in Blender.
Dimensions of common objects
• Canvas Walls are 100 units (approximately 1 meter) wide and tall. They are 5 units (5cm) thick.
• Canvas Cubes are 50 units (50cm) across on all axes.
• Neon Bars are 180 units across and 6.635219 units tall.
• Wicker Couch sections are 75 units across and 60.206459 units tall.
RGB colour codes for natural materials
• Terracotta:
226, 114, 91
194, 69, 45
• Wood
79, 17, 0
120, 23, 8
179, 64, 15
209, 112, 36
36, 17, 7
112, 66, 20
255, 60, 14
112, 59, 18
Conclusion
A final point to be aware of is that not all objects are created equal.
Some of the objects included in the game that can be bought from stores have origins/pivot points that are slightly askew (such as the Bowling Ball Rack for example), and we should all be encouraging the devs to see that these objects are given some polish so that they position, scale, and rotate uniformly.
As for Workshop items there is absolutely no guarantee that the object you are intending to load in has been imported in to the game with great care and attention. Caveat emptor applies in this case.
I hope you all have learned something useful and as well as gained some valuable insight in to how to make your condo’s interior design more aesthetically pleasing.
If you have spotted any details that you believe to be wrong, please do make the effort to correct me.
If you have anything else to add, please post a reply!
Now get out there and go and win some Condo Contests!
Changelog
1st edit:
- Added a guide on Canvas Scaling
- Better formatting
- Minor text changes
2nd edit:
- Better formatting
- Expanded the Other useful information section
- Added guide for dimensions of common objects
27/06/21 (3rd edit):
- Expanded the Other useful information section
- Added guide for Bowling Ball Rack
28/06/21 (4th edit):
- Added changelog section
- Reworded guide on Finding centre between two points
- Expanded the Other useful information section
- Added guide for Natural Material Colours
- Minor text changes
- Fixed typos
29/06/21 (5th edit):
- Added some more images
- Better formatting
- New technique for Fake Monitor Screens