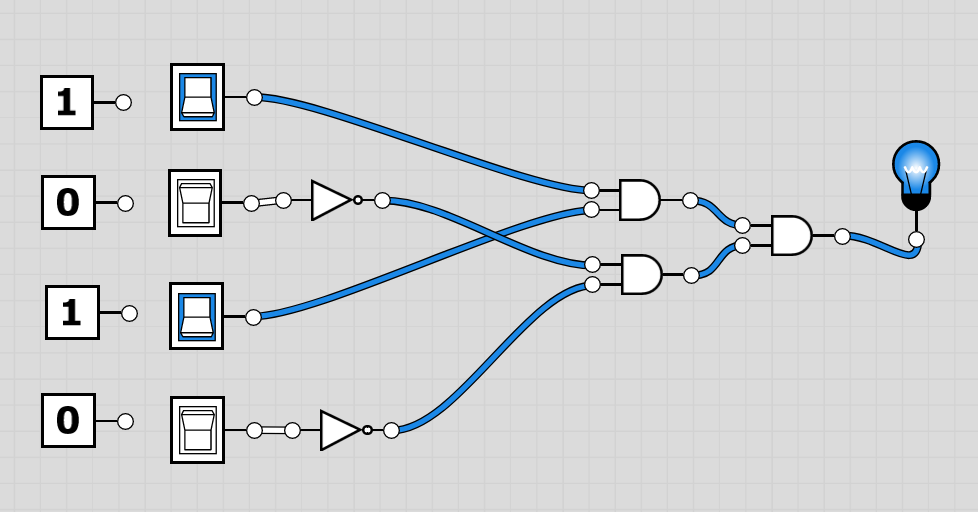
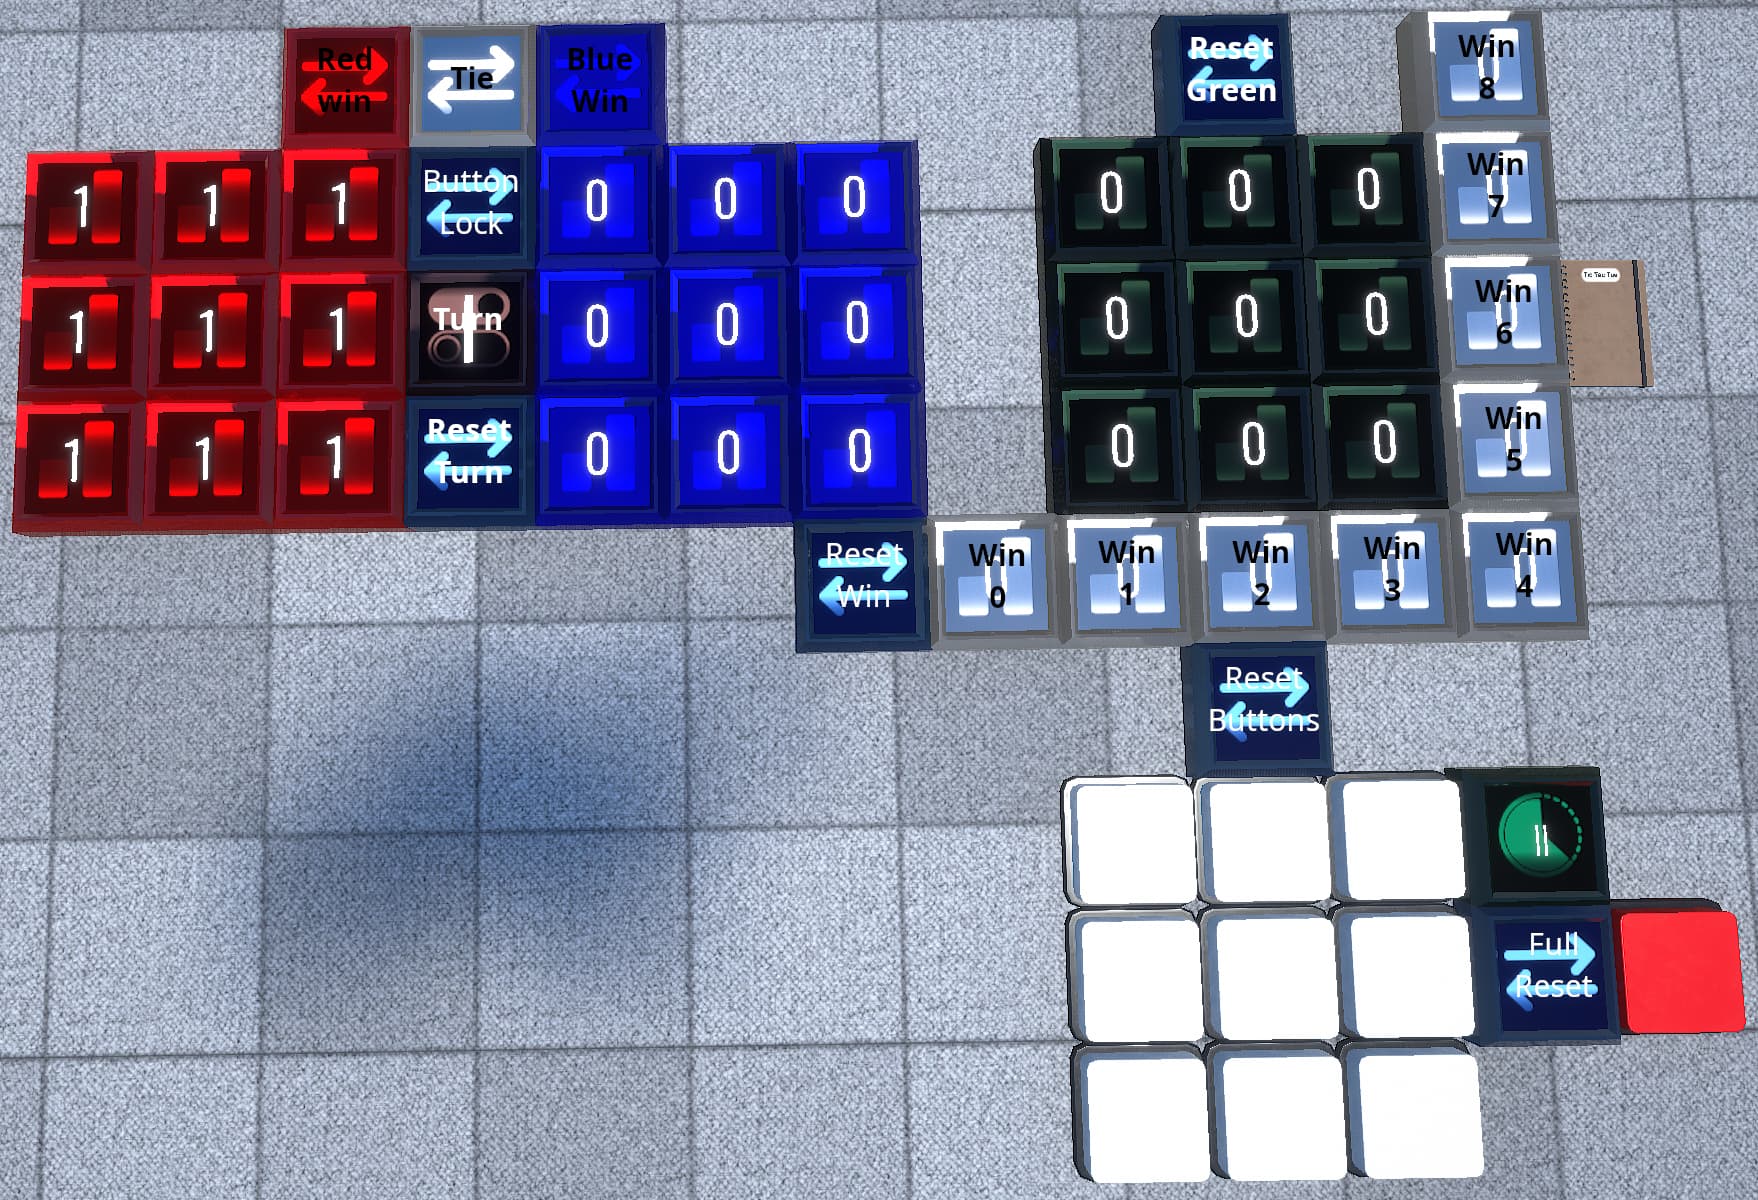
Button Anti-Spam / Basic Counter AND Gates
Can be used if you want a button to trigger something only when it’s allowed to (for example, if you’re making a game, and you don’t want things to get triggered during the game logic loop). Of course, this can be adapted to work with non-button inputs.
Items required
- 1 Button (or other input method)
- 1 Toggle Module
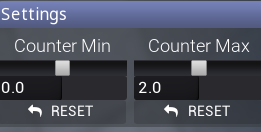
- 1 Counter - Counter Min 0, Counter Max 2
- Condo I/O logic you want to have fire before the button can activate again
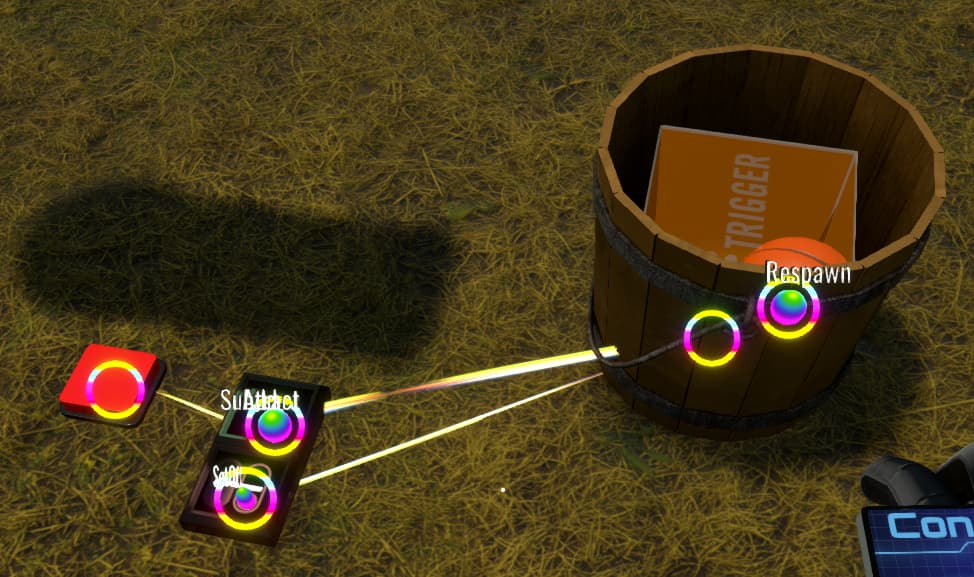
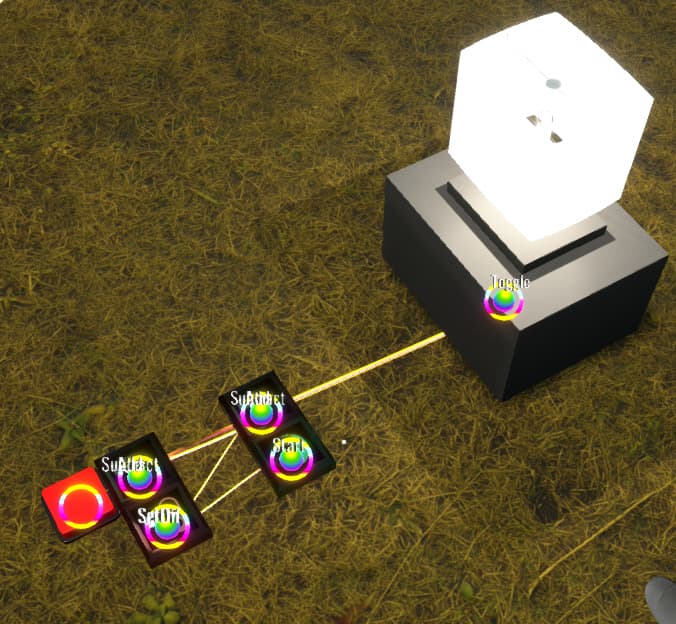
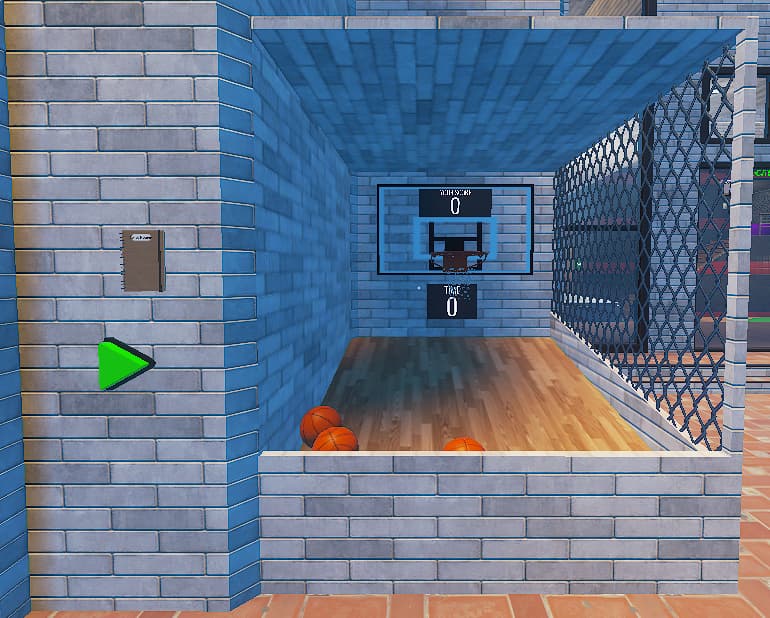
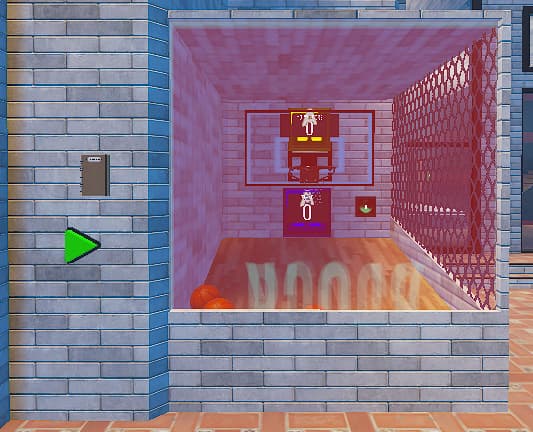
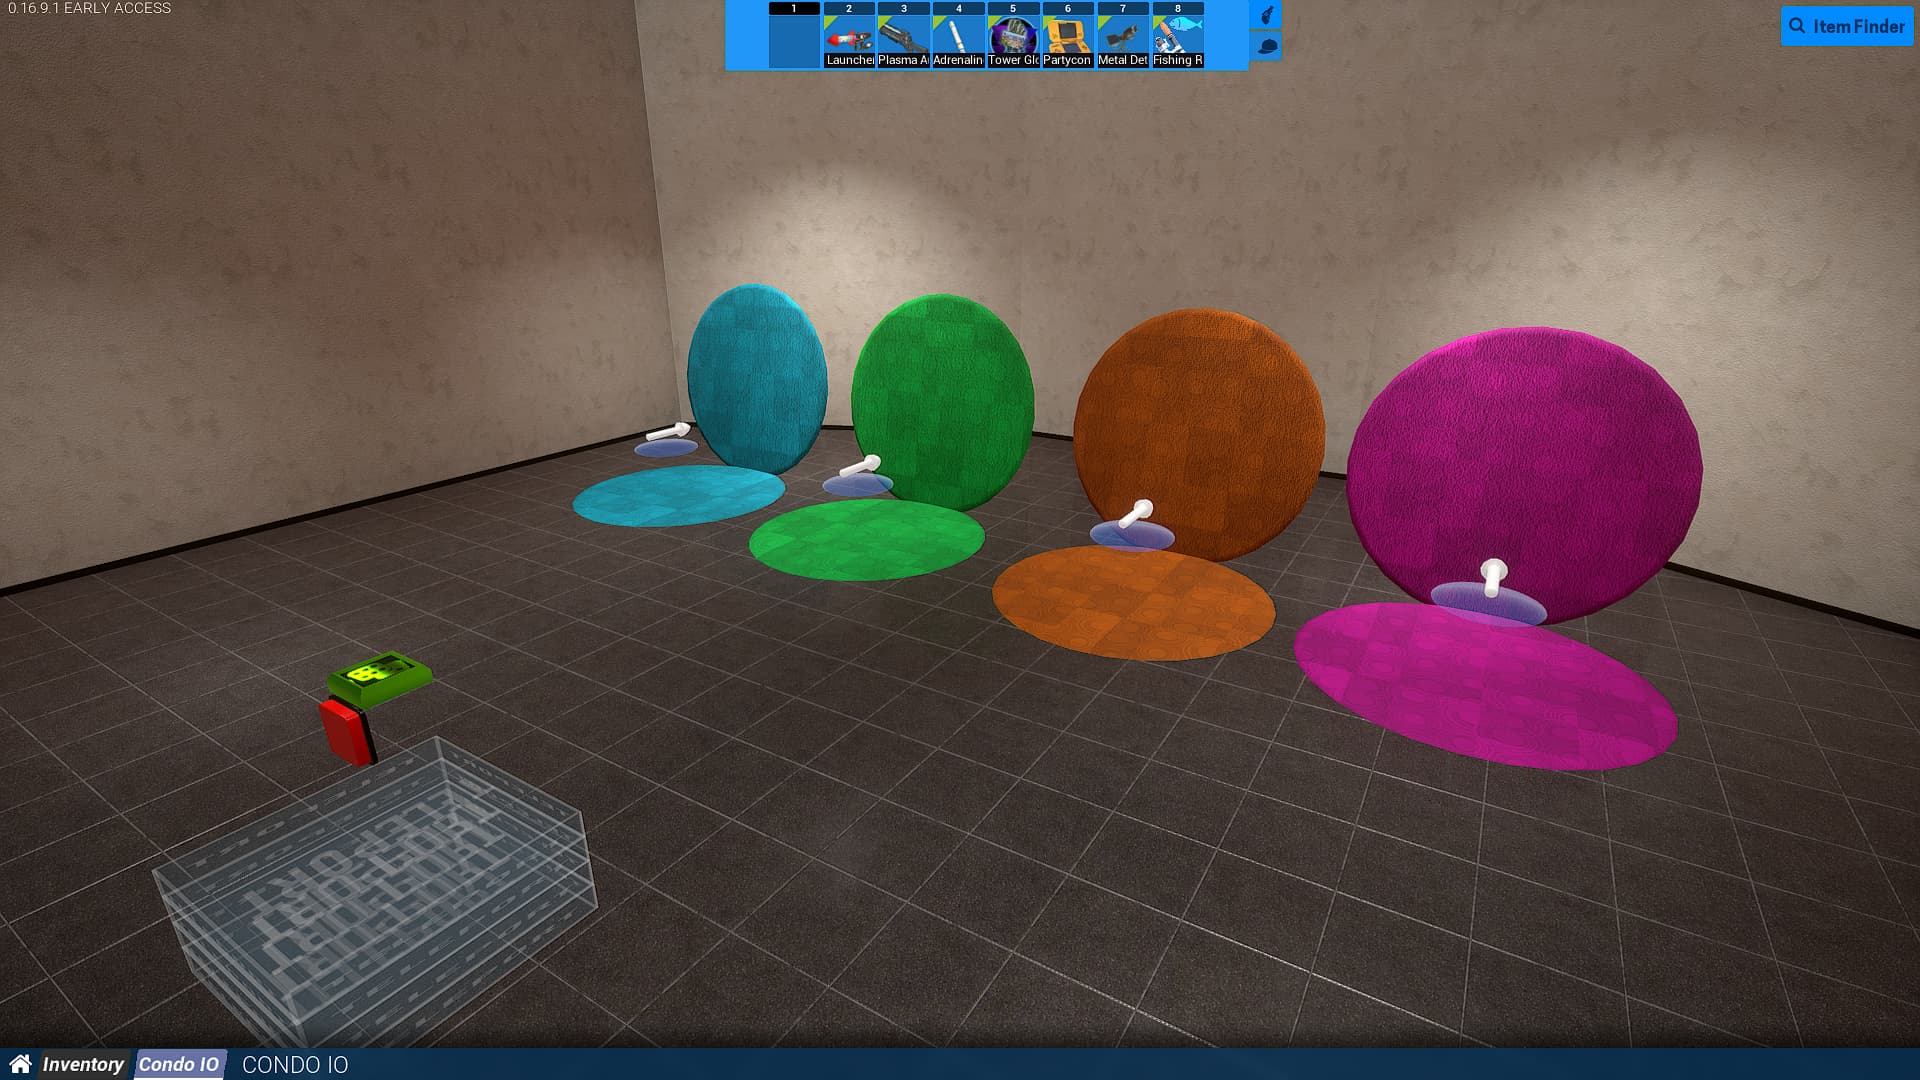
(In this case, we’ll be having a basketball respawn on button press, but only when it’s inside the bucket)
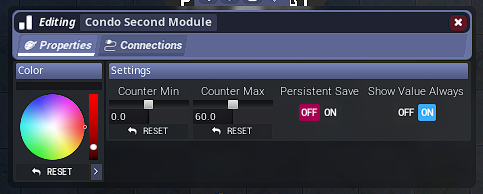
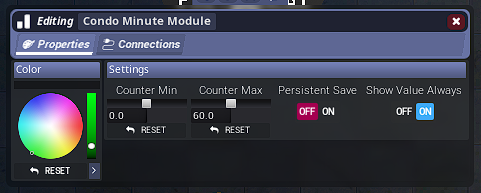
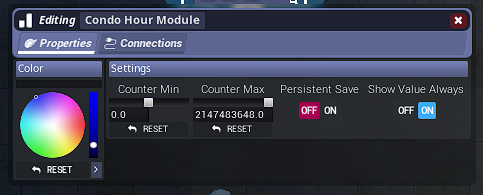
Note: as both toggle and counter module states currently do not save (even with persistent save on), you’ll likely have to set up a fire once trigger volume at spawn to turn on the toggles on load.
Wiring:
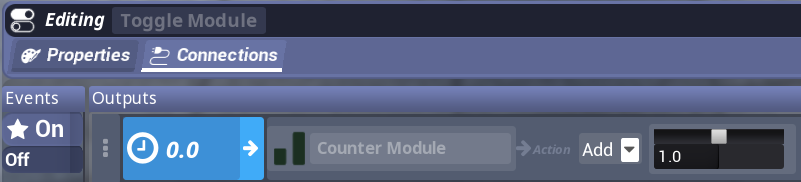
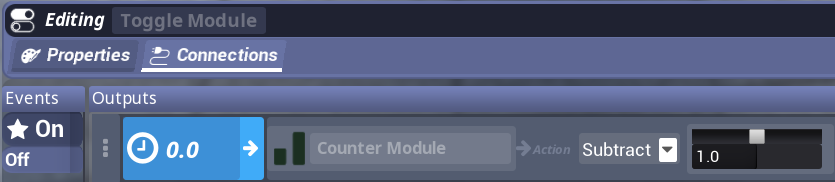
- Connect Trigger Module → Counter Module.
Trigger Module On: 0.0 Delay - Add 1 to the Counter Module
Trigger Module Off: 0.0 Delay - Subtract 1 from the Counter Module
Test the trigger module with a throwaway Condo I/O event. When the trigger is on, the counter should be set to 1, and when the trigger is off, the counter should be set to 0.
- Connect Button → Counter Module
Button OnPressed:
- 0.0 Delay - Add 1 to the Counter Module
- 0.001 Delay - Subtract 1 from the Counter Module
When the button is pressed, the counter should increase by 1 almost imperceptibly briefly before returning to its original value.
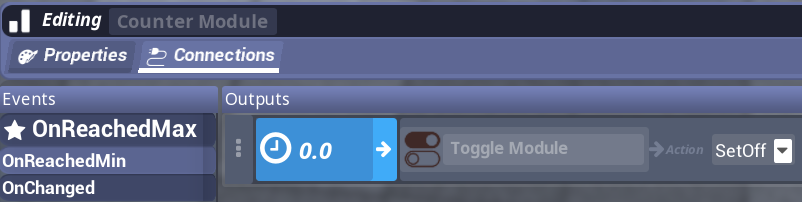
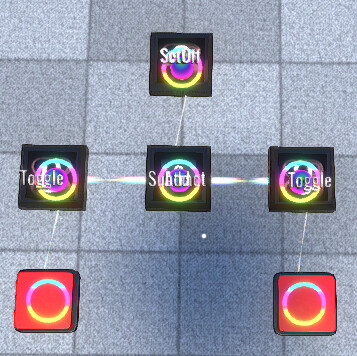
- Connect Counter Module → Condo I/O Logic start, Toggle Module
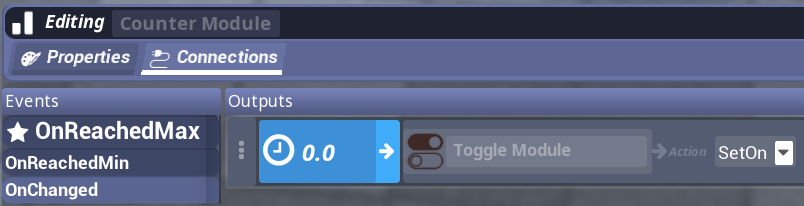
Counter Module OnReachedMax:
- 0.0 Delay - SetOff the Trigger Module
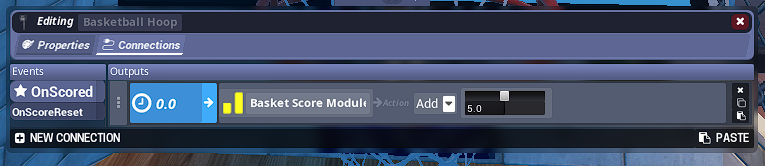
- Trigger desired Condo I/O logic. In this case, this is respawning the basketball.
When the button is pressed while the toggle is enabled, your Condo I/O event should fire (basketball respawns), and the toggle should turn off. Pressing the button afterwards should do nothing.
- Connect Condo I/O Logic end → Toggle Module
- SetOn the Trigger Module
In this case, the trigger volume in the bucket turns on the toggle module when the basketball is inside. (If you want to execute this example in practice, it should also turn off the toggle module when the basketball is removed.)
If the Toggle Module isn’t currently on, turn it on by triggering your Condo I/O logic or through a throwaway Condo I/O event.
With this, your anti-spam button should be complete. Players should be able to press the button as fast as physically possible without breaking your system.
Other use cases:
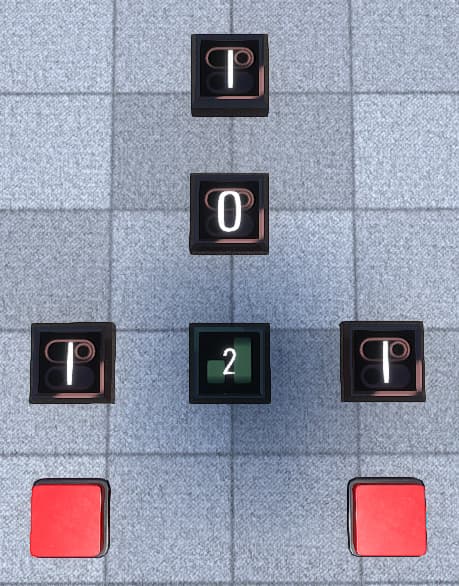
The basic counter + trigger module combination can be easily modified and attached to further Condo I/O modules to mitigate button spam in other use cases.
For example, this circuit has a button turn a lamp on and off, but if the button is pressed too many times in a short period, button inputs no longer work until a cooldown period passes.
The counter module in the toggle-counter pair has been modified to no longer disable the toggle module when the OnReachedMax event occurs, allowing the button to turn the light on and off as long as the toggle remains on.
This circuit also adds an additional counter (PressCounter, max 5) and a Timer Module (set to 1 second).
On a button press, the button adds 1 to the PressCounter, and then subtracts 1 from it after a 0.5 second delay. This causes repeated button presses that occur too quickly to fire the PressCounter’s OnReachedMax event.
When the PressCounter OnReachedMax event fires, it turns off the Toggle Module, and starts the Timer. As the Toggle Module is now disabled, further button presses will have no effect.
When the timer fires its OnTimerComplete event, it turns on the Toggle Module. This re-enables button inputs after the cooldown period.